Choosing a Friendly AVR Chip
10th January 2015
Although the Arduino IDE was originally designed for use with the range of Arduino boards, you can use it as a convenient development system for a range of different Atmel AVR chips, giving you the flexibility of choosing the one that's most appropriate for a particular project.
Here's my results of a survey of all the AVR chips that are friendly, or suitable for home projects, based on the following two requirements:
- Available in a DIP package, so it can be prototyped on a breadboard.
- Supported by a core for the Arduino IDE, so it can be programmed in C via the standard Arduino interface.
For each device I give the number of pins in the DIP package, the number of available I/O lines (without reprogramming the fuses), and the approximate 1-off price (from digikey.com). In each cases I only describe the largest-memory version in the range, as the cost saving of going to a lower-memory version is minimal in one-off quantities. I've omitted chips that are only available in surface-mount packages, and so are inconvenient to use on a breadboard, or older chips that offer no advantages over the chip that has replaced them.
ATtiny85
Pins: 8. I/O lines: 5. Flash: 8K. Cost: $1.70
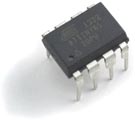
My favourite AVR chip is the ATtiny85; it's the baby of the Atmel AVR range, and fits in a tiny 8-pin package. There are five I/O lines, three of which can be used as 10-bit analogue inputs.
It provides two 8-bit timer/counters, and these allow you to have three analogue PWM outputs (see Four PWM Outputs from the ATtiny85). Timer/Counter1 has a special 64MHz clock option which you can use for fast digital-to-analogue conversion; see Audio Sample Player. The only other AVR chip with this is the ATtiny861. The other neat feature about Timer/Counter1 is that its prescaler provides a complete range of divisor values, with every power of two from 1 to 16384, which makes it great for tone generation; see Simple Tones for ATtiny.
There's no USART, but there's a USI you can use for SPI or I2C, and which you can combine with software to create a USART; see Simple ATtiny USI UART.
The ATtiny85 comes in two versions: the normal ATtiny85 which works from 2.7V (at up to 10MHz) to 5.5V (at up to 20MHz), or the ATtiny85V which works down to 1.8V (at up to 4MHz).
There are two cores you can use to program the ATtiny85 with the Arduino IDE:
- David Mellis's attiny core [1] simply provides pin assignments so the Arduino routines can be used with the ATtiny85. It uses Timer/Counter0 for delay(), millis(), micros(), and analogWrite() on PB0 and PB1, but doesn't support tone().
- The Arduino-Tiny core [2] provides replacement core routines that use Timer/Counter1 for delay(), millis(), micros(), and analogWrite() on PB4, and uses Timer/Counter0 for tone() and analogWrite() on PB0 and PB1.
ATtiny84A
Pins: 14. I/O lines: 11. Cost: $1.80
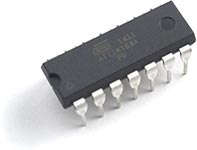
If you need a few more I/O lines, the ATtiny84 is the ideal step up from the ATtiny85. It provides 11 I/O lines, 8 of which can be used as 10-bit analogue inputs. It has two timer/counters, but one of them is 16-bits, allowing you to produce really long time delays, or up to 16-bit PWM. Timer/Counter1 also includes an input capture unit, providing an convenient way of measuring the duration of an event.
As in the ATtiny85 there's no USART, but there's a USI.
The latest version of the ATtiny84 is the reduced current consumption ATtiny84A which works from 5.5V (at up to 20MHz) all the way down to 1.8V (at up to 4MHz).
As with the ATtiny85, you can program the ATtiny84 using the Arduino IDE with the addition of the attiny core [3], or the Arduino-Tiny core [4]. These both use Timer/Counter0 for delay(), millis(), and micros().
ATtiny2313
Pins: 20. I/O lines: 17. Cost: $1.70
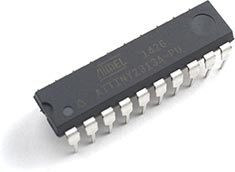
The ATtiny2313 has its good and bad sides. In its favour it has 17 I/O lines, 8 of which are conveniently arranged along one side of the package which often makes prototyping easier. Like the ATtiny84 it has one 8-bit and one 16-bit timer/counter. It's also the only friendly ATtiny with a hardware USART, which makes it ideal for serial applications, such as reading the data from a GPS module (for example see Simple GPS Odometer). However, it doesn't have any analogue inputs, and has a severely limited 2Kbytes of flash memory.
Atmel have released an ATtiny4314 with twice as much memory, but it's not fully supported by the Arduino IDE; with a bit of hacking you can get the IDE to recognise the chip, but not use the full 256 bytes of RAM.
You can program the ATtiny2313 or ATtiny4313 using the Arduino IDE with the Arduino-Tiny core [5].
ATtiny861A
Pins: 20. I/O lines: 15. Cost: $2.54
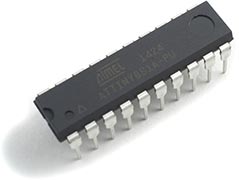
The ATtiny861 is a bit of an oddity. It has 15 I/O lines, nine of which can be used as analogue inputs. It has two unusual timer/counters: Timer/Counter0 can operate in either 8-bit or 16-bit mode. Timer/Counter1 can operate with either 8-bit or 10-bit accuracy, and can be clocked at up to 64MHz, making it useful for waveform synthesis [6].
As in the ATtiny85 there's no USART, but there's a USI.
As with the ATtiny84, the latest version of the ATtiny816 is the reduced current consumption ATtiny861A which works from 5.5V (at up to 20MHz) all the way down to 1.8V (at up to 4MHz).
You can program the ATtiny861 using the Arduino IDE with the ATTinyCore [7]. This uses Timer/Counter0 for delay(), millis(), and micros().
ATtiny88
Pins: 28. I/O lines: 23. Cost: $2.45
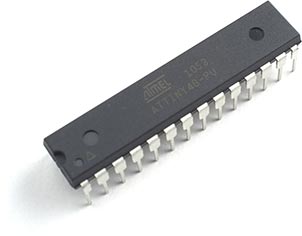
The ATtiny88 is the largest ATtiny processor described here. It has 23 I/O lines, six of which can be used as analogue inputs. Like the ATtiny84 it has one 8-bit and one 16-bit timer/counter.
There's no USART, but there are separate SPI and I2C interfaces. Note that the ATtiny88 is unusual in that it's the only chip listed here that doesn't allow you to connect a crystal for use as the clock, although you can provide an external clock.
I can't really think of any reason to use the ATtiny88 in preference to the ATmega328, unless you need the extra I/O pin. It's not much cheaper, and has fewer features. Let me know if I'm missing something.
Support for the ATtiny88 has recently been added to the ATTinyCore [8].
ATmega328P
Pins: 28. I/O lines: 22. Cost: $3.75
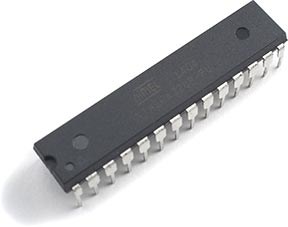
If your program has outgrown the 8Kbytes available in the largest ATtiny chips you could move to the 32Kbyte ATmega328, the popular chip featured in the Arduino Uno board. It provides 22 I/O lines, 6 of which can be used as 10-bit analogue inputs.
It includes three timer/counters, two 8-bit and one 16-bit, allowing 6 analogue PWM outputs. It provides a USART, an SPI interface, and an I2C interface. As a member of the ATmega range it includes a multiply instruction, which makes it faster for arithmetic operations than the ATtiny range.
If you're planning to program it using In-System Programming make sure you buy the picoPower ATmega328P version, because the Arduino IDE doesn't recognise the signature of the older ATmega328 without a workaround [9]. If you're programming it via an on-chip bootloader either version will do, because the bootloader doesn't check the signature.
ATmega1284
Pins: 40. I/O lines: 32. Cost: $8.60
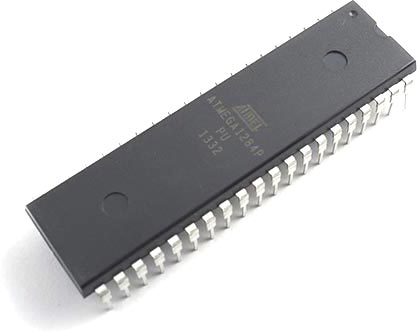
The largest AVR micro with dual-in-line pins is the ATmega1284, a 40-pin chip with four 8-bit ports, one of which can be used to provide eight analogue inputs. It provides a generous 128Kbytes of flash memory, and 16Kbytes RAM. Its large memory capacity makes it the best AVR processor for running programming language interpreters, such a Tiny BASIC.
It has two 8-bit timer/counters and a 16-bit timer/counter, allowing you to have 6 analogue PWM outputs. It provides two USART interfaces, plus SPI and I2C interfaces.
You can program the ATmega1284 using the Arduino IDE with the Mighty-1284P core [10].
Programming these micros
All of these chips can be programmed from the Arduino IDE. For the chips other than the ATmega328 you will need to install a suitable core that adds information about the processor's pins, ports, and timers to the IDE. A list of suitable cores is given above with the description of each processor.
You can upload a program using In-System Programming (ISP), using an interface such as the SparkFun Tiny AVR Programmer [11], by connecting the GND, VCC, Reset, MISO, MOSI, and SCL pins from the programmer to the corresponding pins on the processor. You can also make your own ISP programmer from an Arduino board [12].
Alternatively a bootloader in the processor's flash memory can be used to self-program the chip by uploading a program via the serial port. To use this technique with a bare chip on a breadboard you'll need a USB to FTDI board [13]. This approach is most suitable for chips with built-in USARTs, such as the ATmega328 or ATmega644. Many of the hobbyist sites sell these chips with a bootloader already installed; if you don't buy one of these you'll first need to install the bootloader yourself using ISP.
Buying AVR micros
You can buy all these chips from the usual component suppliers: Digi-Key, Farnell, or Mouser. However these suppliers usually impose a minimum order size, so you may find it more convenient to order them from the hobbyist sites, such as Sparkfun in the USA, or Proto-PIC or HobbyTronics in the UK, who stock the most common chips. You can also find most of the chips in one-off quantities on eBay.
- ^ attiny core on Github.
- ^ Arduino-Tiny core on Google Code.
- ^ attiny core on Github.
- ^ Arduino-Tiny core on Google Code.
- ^ Arduino-Tiny core on Google Code.
- ^ 255-Voice PCM Sound Generator on ELM - ChaN.
- ^ ATTinyCore on GitHub.
- ^ ATTinyCore on GitHub.
- ^ ATmega328-PU workaround on Instructables.
- ^ Mighty-1284P on GitHub.
- ^ Tiny AVR Programmer on SparkFun.
- ^ Arduino board as ATtiny programmer on High-Low Tech.
- ^ Sparkfun FTDI Basic Breakout on SparkFun.
blog comments powered by Disqus