Festive Lights Programming Challenge
2nd December 2019
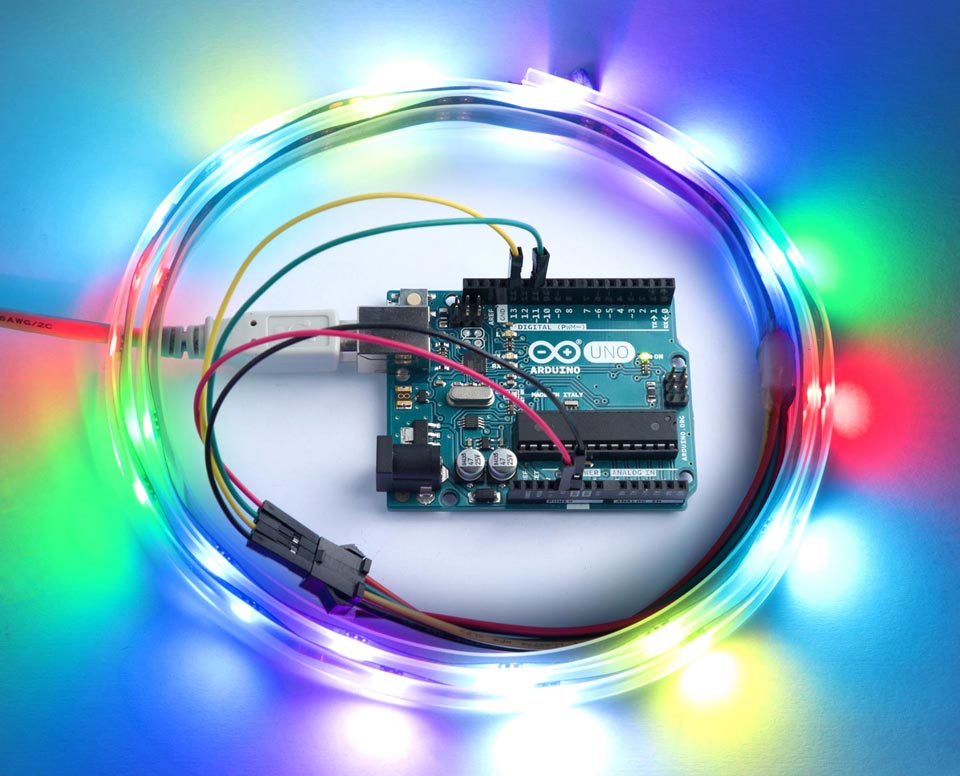
If you feel like doing some creative programming over the next few days why not try my Festive Lights Challenge. The aim is to program a stunning festive lights display using a strip of serial RGB LEDs:
The challenge is an ideal project to introduce beginners to programming on the Arduino, and more experienced programmers should enjoy devising original, subtle light effects. Here are some suggestions:
- Lights that flicker with a yellowish colour, like candles in a draught.
- A gentle wave of light that travels between the lights.
- Lights that sparkle in different colours, like tiny stars.
You can control the lights with a C or Lisp program running on a microcontroller board; anything from an Arduino Uno upwards should be suitable.
Post your contributions in the comments, or email them to me. I'll feature the best contributions in a later post.
Suitable LED strips
To take part in the challenge you just need to get a suitable 1 metre strip of 30 LEDs. They should be either APA102 or SK9822 type RGB serial-controlled RGB LEDs, also named DotStar by Adafruit.
The strips typically come in multiples of 1 metre, with either 30, 60, or 144 LEDs per metre. For this challenge you should get 1 metre of the 30 LED per metre type. This will allow you to power them from the USB supply on the board you are using, without needing an external power supply. Here are some suitable suppliers:
- AliExpress: SK9822 (Similar APA102) Smart RGB Led Pixel Strip.
- Adafruit (white PCB): Adafruit DotStar Digital LED Strip - White 30 LED.
- Adafruit (black PCB): Adafruit DotStar Digital LED Strip - Black 30 LED.
- Pimoroni: Flexible RGB LED Strip (DotStar/APA102/SK9822 compatible).
If you have a choice I recommend the waterproof option, also called IP67.
You shouldn't use the slightly cheaper WS2812 or SK6812 strips, called NeoPixels by Adafruit, as these can't be controlled by standard SPI, and so require a custom library.
A note about current consumption
Most boards, such as the Arduino Uno, won't provide more than 500mA from the 5V pin. In addition, some boards including the Arduino Uno provide a polyfuse that will temporarily disconnect power if you exceed more than 500mA from the USB port.
These LEDs are each programmed with four parameters: a brightness from 0 to 31, and RGB values from 0 to 255. If you program all 30 LEDs with (31 255 255 255) to turn them on at full brightness the current consumption is about 1.5A, well over what a typical processor board can provide. To avoid the need for an external power supply your entry to the Festival Lights Challenge should restrict the brightness and RGB values to ones that are within the range of a typical board. There are two options:
- Restrict the brightness values to 0 to 7 and allow any RGB values from 0 to 255.
- Allow any brightness from 0 to 31 and restrict the RGB values to 0 to 63.
Each of these options limits the current consumption to an acceptable 400mA; choose the one that suits your project.
Connecting up the strip
If you're using an Arduino Uno connect the pins as follows:
| Arduino | LED strip |
| MOSI (Pin 11) | SDI (usually green) |
| SCK (Pin 13) | CLKI (usually yellow) |
| GND | GND (black) |
| 5V | VCC (red) |
Alternatively you can connect to the ICSP connector; see Update.
For other boards see the appropriate reference for that board; for uLisp there's information here: Language reference - with-spi.
If you're using uLisp you'll need to set aside one pin as the enable pin, although it isn't used by the LED strip; I used pin 10 in the example below.
Controlling the APA102/SK9822 LEDs
To control the LEDs you need to send the following data via SPI:
- A start frame consisting of four bytes of 0x00.
Then for each of the 30 LEDs in the strip:
- A byte consisting of the brightness (0 to 31) plus 0xE0.
- Three bytes (each 0 to 255) representing the blue, green, and red components respectively.
Then finally:
- A stop frame consisting of four bytes of 0x00 [1].
The lights will continue to display with the settings you've sent until you send another set of data.
Programming in C
If you'd like to try the challenge in C here's a simple display routine to get you started. It sets all 30 LEDs to random colours and limits the brightness to 7 to avoid excessive current consumption:
#include <SPI.h>

void setup() {
  SPI.begin();
}

const int brightness = 7;

void loop() {
  for (int i=0; i<4; i++) SPI.transfer(0);                 // Start frame
  for (int i=0; i<30; i++) {
    SPI.transfer(min(brightness, 7) + 0xE0);               // Brightness
    for (int c=0; c<3; c++) SPI.transfer(255 * random(2)); // Blue, Green, Red
  }
  for (int i=0; i<4; i++) SPI.transfer(0);                 // Stop frame
  delay(5000);
}
How it works
The program works as follows. The statement:
for (int i=0; i<4; i++) SPI.transfer(0);
sends the start frame, consisting of four zero bytes.
Then for each of the 30 lights it sends one byte to specify the brightness:
SPI.transfer(min(brightness, 7) + 0xE0);
and three bytes (from 0 to 255) to specify the blue, green, and red components:
for (int c=0; c<3; c++) SPI.transfer(255 * random(2));
The value (255 * random(2)) gives either 255 or 0, at random.
If instead you wanted to make each light yellow (red + green) at three-quarters of full brightness, you could replace this line with:
SPI.transfer(0); SPI.transfer(192); SPI.transfer(192);
Running the program
To run it, upload the program to an Arduino Uno, or pretty much any other board supported by the Arduino IDE.
Once you've uploaded it the light display will run automatically when you apply power to the board, such as from a USB power supply or external battery.
Programming in uLisp
If you'd prefer to program the challenge in a higher level language than C you can install my uLisp interpreter and write the program in Lisp. The interpreter and program will comfortably fit on an Arduino Uno, although for more ambitious projects you might want to choose another board that gives more program space; see uLisp - Lisp for microcontrollers.
Here's the Lisp version of the above program:
(defun dis ()
  (let ((bri 7))
    (loop
     (with-spi (str 10)
       (dotimes (i 4) (write-byte #x00 str)) ; Start frame
       (dotimes (i 30)
         (write-byte (+ (min bri 7) #xE0) str) ; Brightness
         (dotimes (c 3)
           (write-byte (* 255 (random 2)) str))) ; Blue, Green, Red
       (dotimes (i 4) (write-byte #x00 str))) ; End frame
     (delay 5000))))
To run it evaluate:
(dis)
You can save the image with:
(save-image 'dis)
Provided you've uploaded uLisp with the resetautorun option the light display will now run automatically when you apply power to the board.
Happy programming!
Fairy lights
Here’s the festive light display I used on my tree over Christmas. This one simulates flashing incandescent coloured fairy lights. Each LED flashes with a regular period, and with a consistent colour, but the periods of all the lights are slightly different, so the sequence of flashes is continuously varying and unpredictable.
#include <SPI.h>

const int bri = 7, off = 120;

uint8_t Colour [8][3] = {{0, 0, 31}, {31, 0, 31}, {0, 0, 255}, {31, 0, 255},
{255, 0, 255}, {0, 31, 255}, {31, 31, 255}, {255, 31, 255}};

void setup() {
  SPI.begin();
}

void loop() {
  for (int n=0; n<=32767; n++) {
    for (int i=0; i<4; i++) SPI.transfer(0);
    for (int i=0; i<30; i++) {
      int j = (7 + i * 13) % 30;
      int k = n % (off + j);
      SPI.transfer(min(bri, 7) + 0xE0);
      for (int c=0; c<3; c++) {
        if (k == 0) SPI.transfer(Colour[j & 7][c]);
        else SPI.transfer(0);
      }
    }
    for (int i=0; i<4; i++) SPI.transfer(0);
    delay(10);
  }
}
The colours are all chosen from an orange/red/pink range of hues, defined by the array Colour. The variable off determines the average rate of flashing. Increase it to, say, 240, for slower flashes. The variable bri determines the brightness. Reduce it for dimmer lights.
Updates
3rd December 2019: One neat way to connect an LED strip to your Arduino board is via the ICSP connector on the right-hand edge of the board. This provides access to the four connections you need in a single convenient connector:
26th December 2019: Added some explanation of how the program works.
14th January 2020: Added a sample festive lights display, Fairy lights.
- ^ Some instructions specify the stop frame as four bytes of 0xFF, but I find this works better.
blog comments powered by Disqus