I2C SD-Card Module PCB
14th July 2022
This is a module, based on an ATtiny1614, that allows you to write to and read from files on an SD card using a two-wire I2C interface:
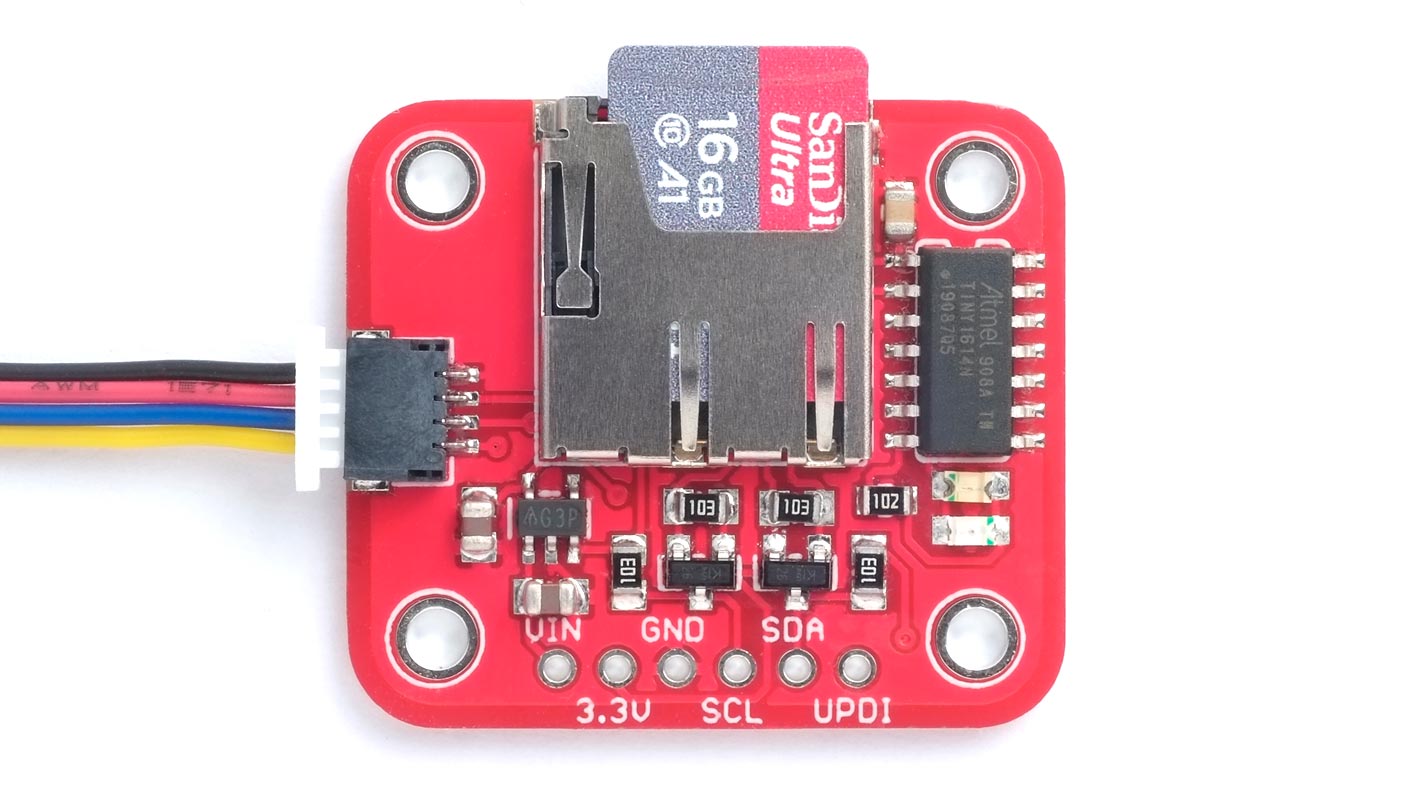
An I2C SD-Card Module that allows you to write to and read from SD cards via I2C.
It's a PCB version of last week's I2C SD-Card Module project.
Update
21st January 2025: Added a note about SD card compatibility.
8th March 2025: Two users have reported that the SD-card module doesn't work with the I2C interface on an ESP32. I've confirmed this, but haven't yet been able to find a solution, so currently it's not suitable for use with the ESP32.
Introduction
I designed this module for use in situations where you want to write data to an SD card, or read from an SD card, but don't have enough I/O lines available to wire up an SPI SD card interface, or else the SPI lines are already in use, or else the processor you are using doesn't have enough RAM to run the SD library.
I wanted the SD-card module to be suitable for use with either 5V or 3.3V microcontrollers, but Micro SD cards operate at 3.3V, so some sort of logic-level conversion is needed.
In my original project I used Adafruit's MicroSD board [1], which includes a CD74HC4050 unidirectional logic-level shifting chip on the Data In, Clock, and Chip Select pins, allowing it to be interfaced to an ATtiny processor running from either 3.3V or 5V.
For the PCB version I decided it made more sense to run the ATtiny processor at 3.3V, so it could connect directly to the SD card. Although this avoids the need for the level translation on the SPI lines between the processor and SD card, we now need bidirectional logic-level conversion on the I2C lines that connect to the outside world. The benefit is minimal, depending on the relative costs of the components.
The board includes a JSP PH 4-pin connector, compatible with Adafruit's STEMMA QT system, so you can connect to the board without soldering.
SD card compatibility
Note that the Arduino SD Card library only supports FAT16 or FAT32; FAT12 and ExFAT are not supported. Although 64 GB or 128 GB cards can be formatted as FAT32, some formatting programs such as File Explorer will only format them in ExFAT. If you have problems using a card check its format.
The circuit
Here's the circuit of the PCB version:
Circuit of the I2C SD-Card Module PCB.
You could probably use an ATtiny1624 or ATtiny3224 instead of the ATtiny1614, but I haven't tried them.
► Parts list
Construction
I designed a PCB in Eagle and sent it to PCBWay [2] for production. There's a link at the end of the article if you want to make yourself some boards.
I used a Youyue 858D+ hot air gun at 275°C and Chip Quik SMD291AX10T3 solder paste to solder the components, but if you don't have a hot air gun or reflow oven you should be able to use a fine-tipped soldering iron and fine solder, or solder paste.
Unless you're using a reflow oven I recommend finding a MicroSD socket with accessible pins, like the one I used in the prototype [3], so you can get to the pins to solder them:
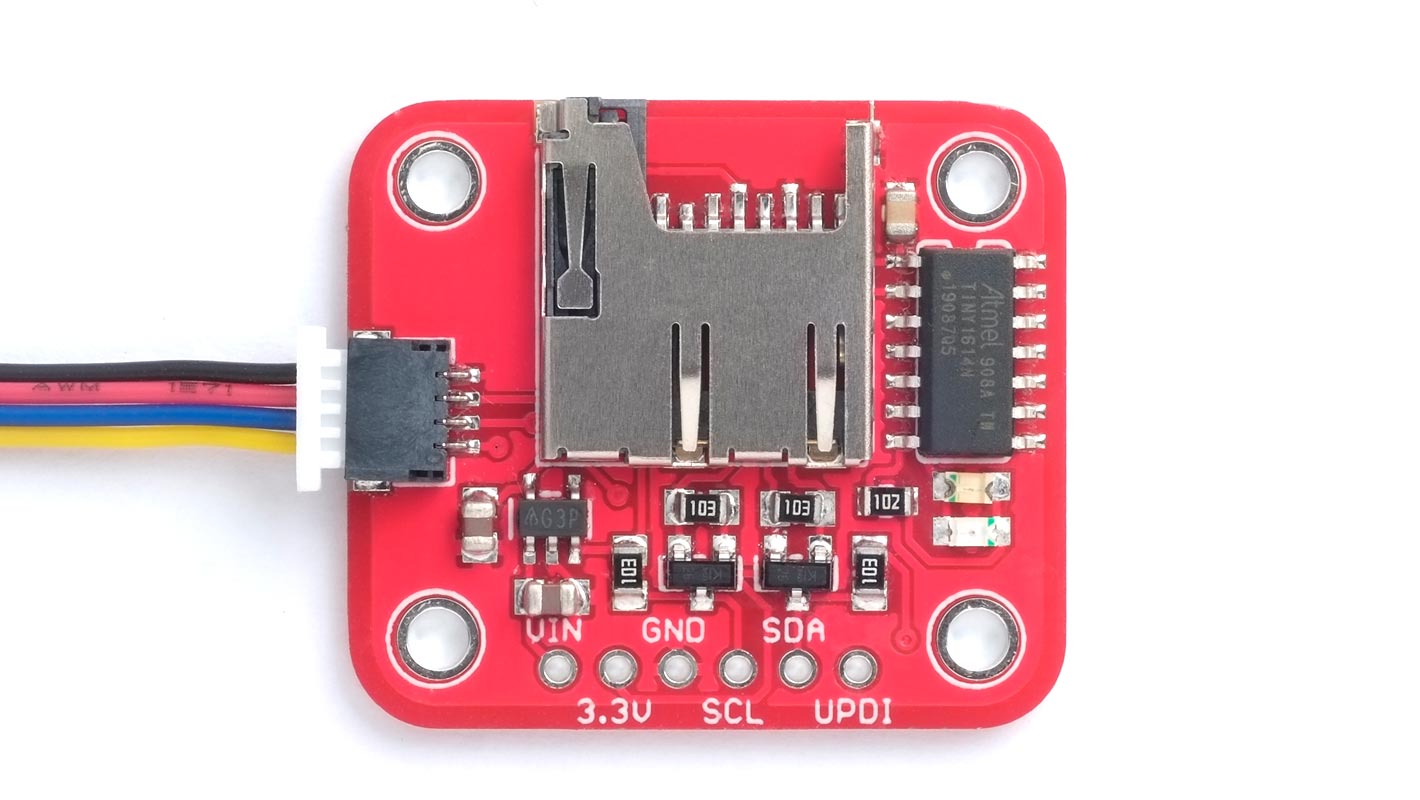
The I2C SD-Card Module showing the empty SD card socket.
Compiling the program
Compile the program using Spence Konde's megaTiny Core on GitHub. Choose the ATtiny3224/1624/1614/1604/824/814/804/424/414/404/241/204 option under the megaTinyCore heading on the Board menu. Check that the subsequent options are set as follows (ignore any other options):
Chip: "ATtiny1614" (or as appropriate)
Clock: "20 MHz internal"
Then upload the program to the I2C SD-Card Module using a UPDI programmer. The recommended option is to use a USB to Serial board, such as the SparkFun FTDI Basic board [4], connected with a 4.7kΩ resistor as follows:
Set the Programmer option to "SerialUPDI with 4.7k resistor or diode (230400 baud)".
Resources
Here's the program for the I2C SD-Card Module: I2C SD-Card Module Program.
Get the Eagle files for the PCB on GitHub here: https://github.com/technoblogy/i2c-sd-card-module.
Or order boards from OSH Park here: I2C SD-Card Module.
Or order boards from PCBWay here: I2C SD-Card Module.
Update
21st July 2022 - Corrected the labelling of the MOSFET terminals in the circuit diagram.
- ^ MicroSD card breakout board on Adafruit.
- ^ PCBWay PCB prototype service.
- ^ Memory Card Connector MicroSD on Farnell.com.
- ^ SparkFun FTDI Basic Breakout - 5V on Sparkfun.
blog comments powered by Disqus