Eight-Character Alphanumeric Display
16th December 2019
This is an eight-character alphanumeric LED display with an I2C interface. It's based on a low-cost HT16K33 display-driver chip, and supports four two-character 14-segment alphanumeric display modules. Because it has an I2C interface it's easy to drive from pretty much any microcontroller, such as an Arduino Uno, or even an ATtiny85:
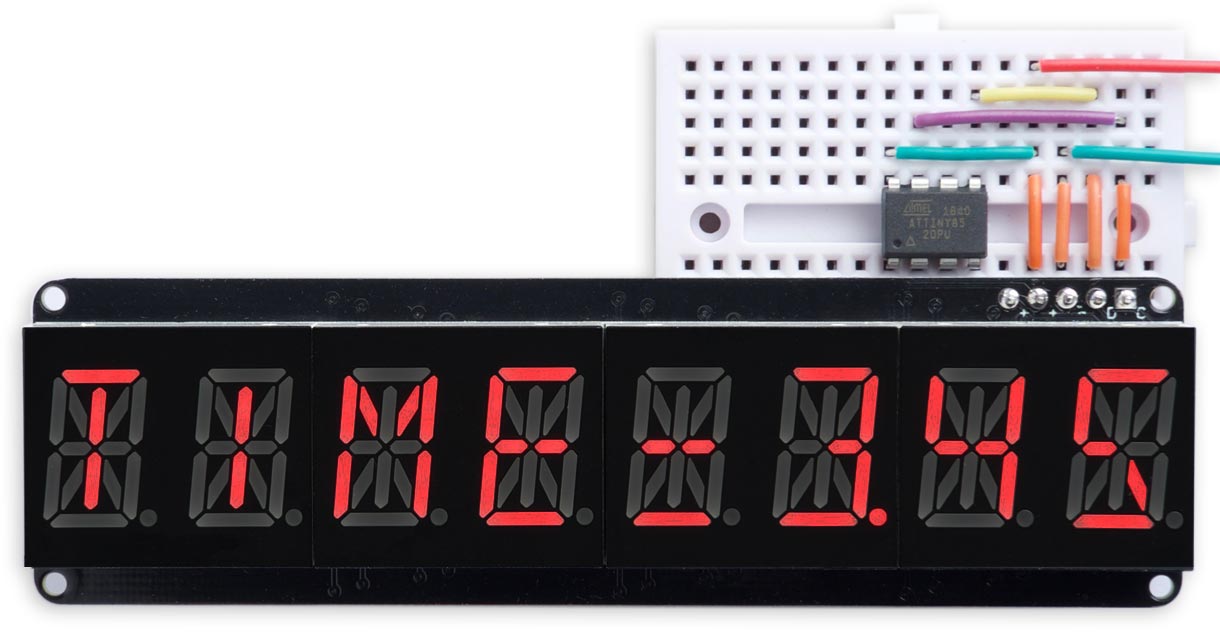
Eight-Character Alphanumeric LED Display, controlled by an ATtiny85 via I2C.
I also include a display interface that provides a print() class that allows you to print strings and numbers to the display, with automatic scrolling. This lets you use the display as a convenient alternative to the Arduino Serial Monitor for printing values and results while debugging. The display interface will also work with Adafruit's four-character alphanumeric displays.
Introduction
I wanted an eight-digit alphanumeric display, for displaying messages for another project which I hope to write about in a future article, and sourced a set of low-cost alphanumeric display modules from AliExpress. A good I2C driver for this type of application is the HT16K33 [1] which can support up to 8 displays x 16 segments, as well as a key matrix. Adafruit make a nice I2C backpack based on the HT16K33 [2] but it only drives two 2-digit display modules, so I would have needed two backpacks. I therefore decided to design my own HT16K33-based backpack that would support eight alphanumeric digits.
It's compatible with a wide variety of two-digit 0.54" (13.8mm) display modules. I used LDS-5241BX two-digit display modules from AliExpress [3], but you could also use KWA-541AWB-Y two-digit display modules available in a variety of colours from Adafruit [4], or the Kingbright PDC54-11SYKWA from RS-Online [5].
Note that there are displays that look identical to these that won't work on this board. The HT16K33 only supports common cathode displays, so you must make sure the displays you buy are common cathode. Also, Kingbright make other 14-segment displays that common the segments in two groups, reducing the number of pins needed, and these won't work either.
Circuit
Here's the circuit:

Circuit of the Eight-Character Alphanumeric Display, based on an HT16K33.
On the header SDA and SCL are the I2C connections, and VCC and GND are the power pins. The board includes pullups for the I2C pins, and these connect to a separate pin, Vi2c.
- Connect Vi2c to your microcontroller's logic level, +5V or +3V.
- Connect VCC to +5V. If not available use +3V, but the displays won't be as bright.
► Parts list
Construction
I designed a board in Eagle and sent it to PCBWay for fabrication [6]; I chose black PCBs to match the display surrounds. There are links at the end of the article if you want to order or make yourself a board.
The HT16K33 is in an SOIC package, and the resistors and capacitor are all 0805 size, so they should be relatively easy to solder by hand. I used a Youyue 858D+ hot air gun.
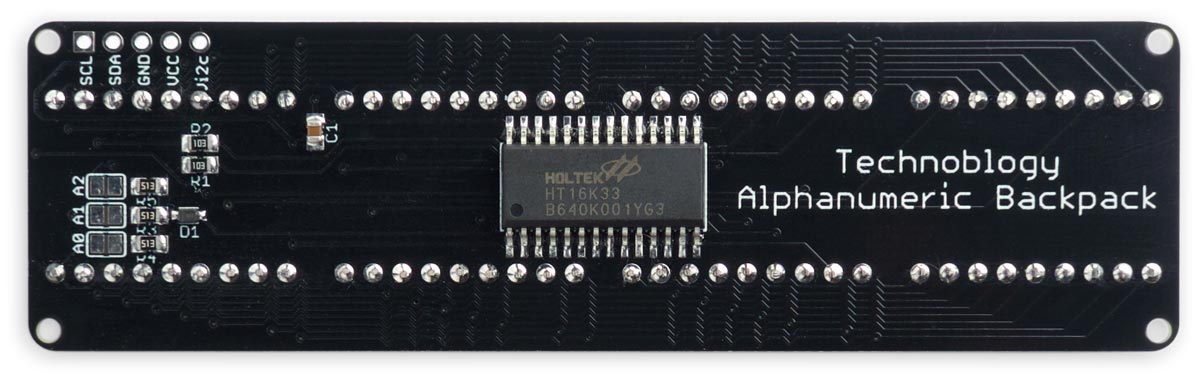
The back of the Eight-Character Alphanumeric Display board.
Check carefully that you have oriented the display modules correctly before soldering them in, as there's no going back! My approach was to solder two diagonally opposite pins of each display module first, and then check that they are all fully seated on the board and line up nicely. It's really annoying to finish the soldering, and then find that one of the displays is slightly wonky. Then solder the other pins, and finish off by clipping the pins flush with the soldered joints.
The default I2C address is 0x70. You can also choose one of 7 alternative addresses, 0x71 to 0x77, by adding links at A0, A1, and/or A2.
Display interface
This display interface lets you print to the display using the standard print() I/O functions to print strings and numbers. It has the following features:
- Characters printed to the display go to successive character positions.
- When they reach the end of the display, successive characters will scroll the display to the left so you can always see the last eight characters. You can set the scroll speed.
- A decimal point in a string isn't printed as a separate character, but lights the decimal point of the previous character, so the string: "3.1415926" will fit on the eight displays.
- The newline character appears as a space.
- You can clear the display by printing a clear character (12), or calling the clear() function.
You can also use this display interface with Adafruit four-character alphanumeric displays by changing the global variable DisplaySize from 8 to 4.
Defining the segments
The array Segs[] is used to define the segment patterns for the 64 characters from space (ASCII code 32) to '_' (ASCII code 95):
const uint16_t Segs[64] = {
0x0, 0x6, 0x220, 0x12CE, 0x12ED, 0xC24, 0x235D, 0x400,
0x2400, 0x900, 0x3FC0, 0x12C0, 0x800, 0xC0, 0x0, 0xC00,
0xC3F, 0x6, 0xDB, 0x8F, 0xE6, 0x2069, 0xFD, 0x7,
0xFF, 0xEF, 0x1200, 0xA00, 0x2400, 0xC8, 0x900, 0x1083,
0x2BB, 0xF7, 0x128F, 0x39, 0x120F, 0xF9, 0x71, 0xBD,
0xF6, 0x1200, 0x1E, 0x2470, 0x38, 0x536, 0x2136, 0x3F,
0xF3, 0x203F, 0x20F3, 0xED, 0x1201, 0x3E, 0xC30, 0x2836,
0x2D00, 0x1500, 0xC09, 0x39, 0x2100, 0xF, 0xC03, 0x8 };
Although the display can in theory show lower-case letters, they are not very readable, so I've only supported the upper-case characters; lower-case characters are displayed in upper case.
Defining the AlphaDisplay class
First we define a class called AlphaDisplay based on the Print class. This enables it to inherit the behaviour of the standard I/O functions such as print() to print strings and integers:
class AlphaDisplay : public Print {
  public:
    void init();
    size_t write(uint8_t);
    void clear();
  private:
    void send(uint8_t);
    uint8_t cur = 0;
    char buf[DisplaySize];
};
Initialising the display
First the routine init() sends three commands to initialise the display, and clears the display:
void AlphaDisplay::init () {
  Wire.begin();
  Wire.beginTransmission(I2CAddress);
  Wire.write(0x21);                // Normal operation mode
  Wire.endTransmission(false);
  Wire.beginTransmission(I2CAddress);
  Wire.write(0xE0 + Brightness);   // Set brightness
  Wire.endTransmission(false);
  clear();                         // Clear display
  Wire.beginTransmission(I2CAddress);
  Wire.write(0x81);                // Display on
  Wire.endTransmission();
}
Sending data
The routine send() sends the segment definitions for a character to the display as two bytes:
void AlphaDisplay::send (uint8_t x) {
  uint16_t dp = 0;
  if (x & 0x80) { dp = 0x4000; x = x & 0x7F; }
  if (x >= 0x60) x = x - 0x20;
  uint16_t segments = Segs[x - 32] | dp;
  Wire.write(segments);
  Wire.write(segments >> 8);
}
Clearing the display
The routine clear() clears the display:
void AlphaDisplay::clear () {
  Wire.beginTransmission(I2CAddress);
  for (int i=0; i<(2*DisplaySize+1); i++) Wire.write(0);
  Wire.endTransmission();
  cur = 0;
}
Writing to the display
Finally, the routine write() is called by the Print functions to write a character to the display:
size_t AlphaDisplay::write (uint8_t c) {
  if (c == 13) c = ' ';            // Carriage return displayed as space
  if (c == '.') {
    c = buf[cur-1] | 0x80;
    Wire.beginTransmission(I2CAddress);
    Wire.write((cur-1) * 2);
    send(c);
    Wire.endTransmission();
    buf[cur-1] = c;
  } else if (c >= 32) {            // Printing character
    if (cur == DisplaySize) {      // Scroll display left
      Wire.beginTransmission(I2CAddress);
      Wire.write(0);
      for (int i=0; i<7; i++) {
        uint8_t d = buf[i+1];
        send(d);
        buf[i] = d;
      }
      Wire.endTransmission();
      cur--;
    }
    Wire.beginTransmission(I2CAddress);
    Wire.write(cur * 2);
    send(c);
    Wire.endTransmission();
    buf[cur] = c;
    cur++;
    if (cur == DisplaySize) delay(Scrollspeed);
  } else if (c == 12) {            // Clear display
    clear();
  }                                // Other characters don't print
  return 1;
}
Characters are buffered in the array buf[] as they are written to the display, and this is used to rewrite the display when it scrolls.
Demo program
First create an instance of the AlphaDisplay class, called Display:
AlphaDisplay Display;
Then to set up the display, and write scrolling text to the display, run:
void setup() {
  Display.init();
  Display.println("The quick brown fox jumps over the lazy dog.");
  Display.print("The value of pi = ");
  Display.println(acos(-1.0));
}
Here's the whole program: Alphanumeric Display Program
Get the Eagle files for the PCB from GitHub so you can make yourself a board, at: https://github.com/technoblogy/alphanumeric-display.
Or order a board from PCBWay here: Eight-Character Alphanumeric Display.
Or order a board from OSH Park here: Eight-Character Alphanumeric Display.
Further suggestions
If you're running the program on a processor with limited RAM, such as an ATtiny85, you can store the segment definitions in program memory by changing the first line of the definition of Segs[] to:
const uint16_t Segs[64] PROGMEM = {
You'll also need to change the assignment to segments in send() to:
uint16_t segments = pgm_read_word(&Segs[x - 32]) | dp;
It would also be possible to update my display interface to work with multiple display modules in a row. You would need to address each display module in turn, using the appropriate I2C address.
- ^ HT16K33 Datasheet on Adafruit.
- ^ Quad alphanumeric display on Adafruit.
- ^ 14 segment 0.54 LED display modules on AliExpress.
- ^ Dual Alphanumeric Display - Red 0.54" Digit Height on Adafruit.
- ^ PDC54-11SYKWA Kingbright 2 Digit 14-Segment LED Display CC Yellow on RS-Online.
- ^ PCBWay PCB prototyping service.
blog comments powered by Disqus