Printing to a Serial LED Display
23rd March 2022
This article describes a simple routine to allow you to use a low-cost eight-digit LED module to display formatted data from a microcontroller project:
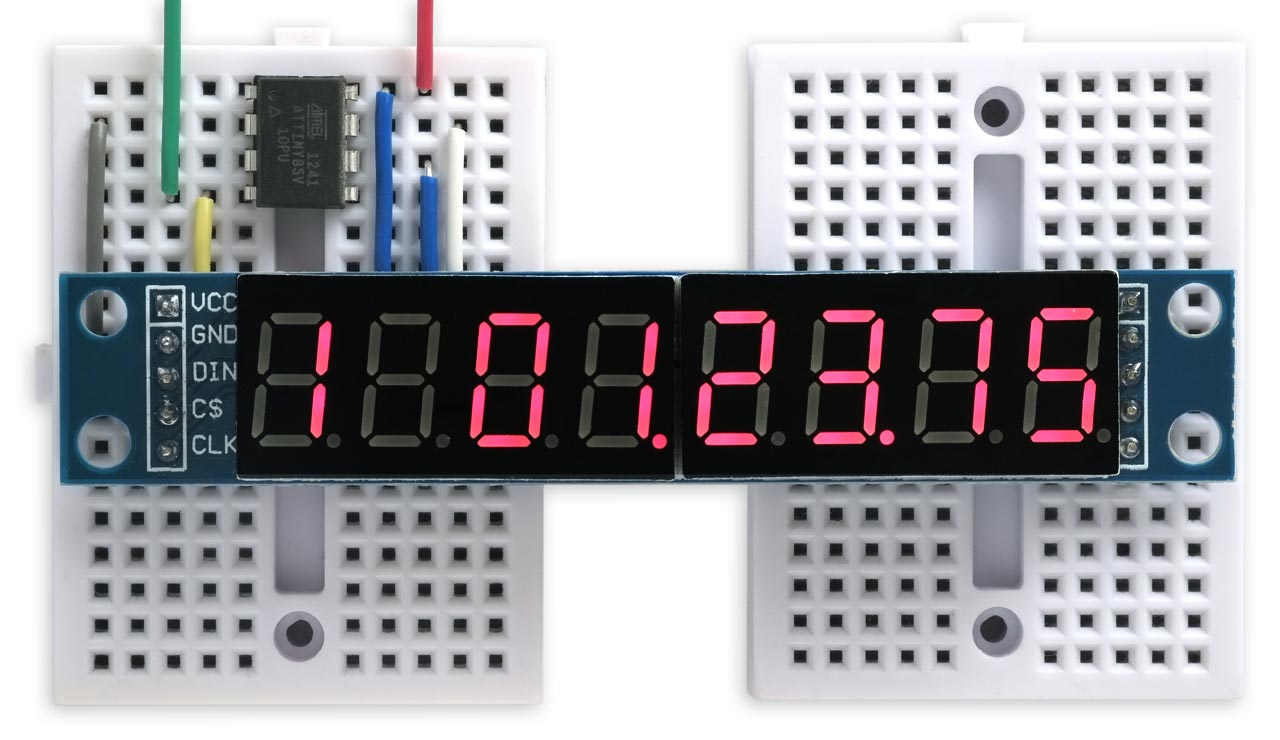
Displaying data on an eight-digit LED display module from an ATtiny85
using the routine described in this article.
The routine will work with almost any microcontroller; as a demonstration of the routine I've written a simple stopwatch program for the ATtiny85 or ATtiny402.
Introduction
Seven-segment LED displays are a great way to provide clear, readable output from a project such as a digital clock, voltmeter, or frequency meter. They are also useful for providing debugging information when developing a project. The only downside is that there are a lot of pins to wire up, but you can avoid this by using a serial seven-segment display module that you connect to with a simple I2C or SPI interface.
To test the routine I chose a low-cost eight-digit seven-segment display module that is available from many vendors, including eBay, AliExpress [1], and Banggood:
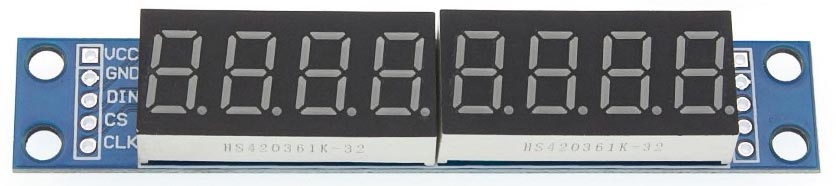
Eight-digit LED display module based on a MAX7219.
They are based on the MAX7219 display driver [2] which is easy to control using SPI.
The MAX7219 is specified as operating from 4.0V to 5.5V, but it seems to work fine from 3.3V. For a brighter display when using it with a 3.3V board connect VCC on the MAX7219 to the +5V pin on the board.
Connecting the display
Connect the display using the appropriate SPI pins as follows:
| VCC | +5V |
| GND | GND |
| DIN | MOSI/DI |
| CS | Enable |
| CLK | SCK |
ATtiny85 version
Here's how to connect the SPI serial display to an ATtiny85 (or ATtiny45/ATtiny25):
Connecting the eight-digit LED display module to an ATtiny85.
Note that because the ATtiny85 implements SPI using the USI, and it's acting as the SPI master, the DIN line on the display needs to connect to the DO line on the ATtiny85 (not MOSI). PB3 (digital I/O pin 3) is used as the chip select.
ATtiny402 version
Here's how to connect the SPI serial display to an ATtiny402 (or ATtiny202/ATtiny412/ATtiny212):
Connecting the eight-digit LED display module to an ATtiny404.
On the ATtiny402 the display connects to the MOSI and SCK lines. PA7 (digital I/O line 1) is used as the chip select, so you need to change the declaration at the start of the source to:
const int cs = 1;
Here's the prototype I used to try this out:
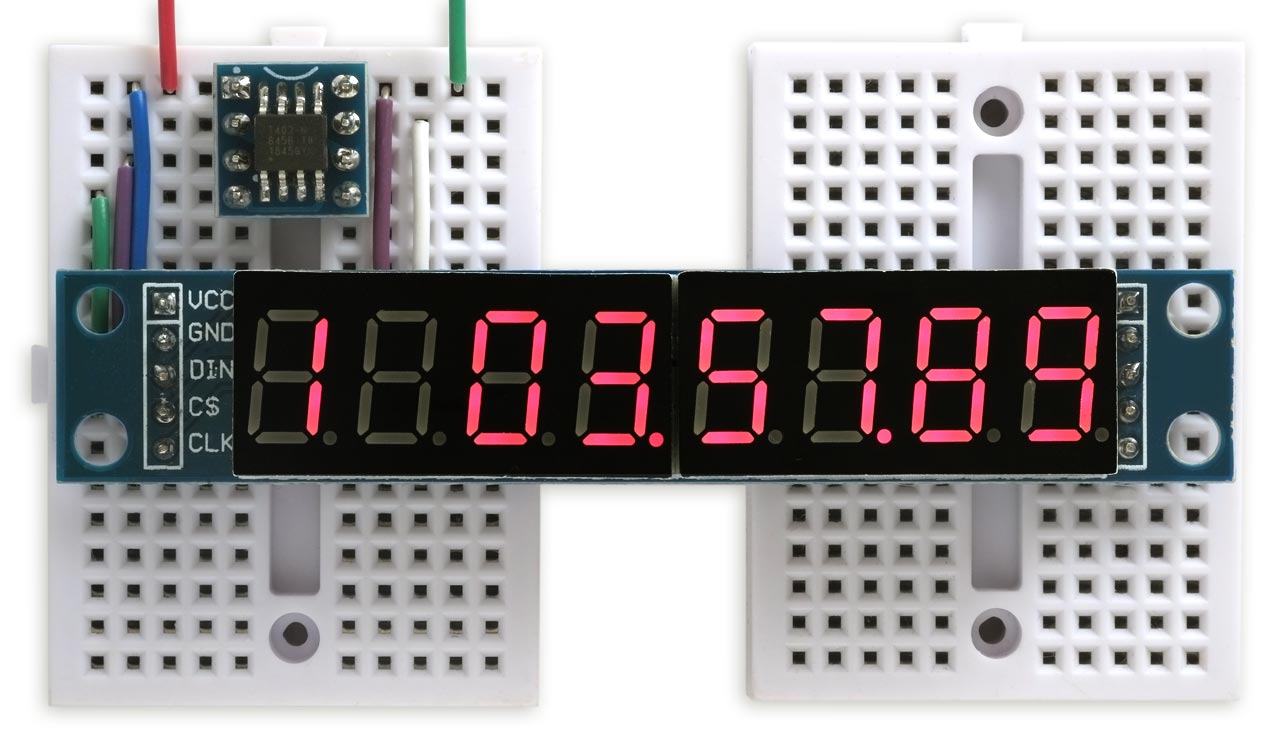
Displaying data on an eight-digit LED display module from an ATtiny402
using the routine described in this article.
Printf()
The C function printf() is a print function that allows you to format several values using flexible format specifiers. Spence Konde has recently added support for printf() to his megaTinyCore and DxCore cores for the smaller AVR microcontrollers, and several other Arduino cores already include printf() support.
At first I couldn't see the benefit of printf() support in small microcontrollers, especially if like me you don't generally use the devices with serial output to the Serial Monitor. However, I recently realised that printf() gives an excellent way of displaying formatted output on a display, such as a serial LED display, using a routine like the one in this article.
The following table shows a selection of popular Arduino cores, and whether they support printf():
| Arduino core | Example | printf() |
| Adafruit SAMD Boards | Adafruit Feather M0 | Yes |
| Arduino AVR Boards | Arduino Uno | No |
| Arduino Mbed OS RP2040 Boards | Raspberry Pi Pico | No |
| Arduino SAMD Boards | Arduino Zero | No |
| ATTinyCore | ATtiny85 | Yes |
| DxCore | AVR128DA28 | Yes |
| ESP32 Arduino | Adafruit ESP32 Feather | Yes |
| ESP8266 Boards | Adafruit ESP8266 Feather | Yes |
| megaTinyCore | ATtiny402 | Yes |
| Raspberry Pi RP2040 Boards | Raspberry Pi Pico | Yes |
| STM32 Boards | Maple Mini | Yes |
Examples
An example of how you would use printf() is:
int E = 23;
Serial.printf("E = %d", E);
which will print:
E = 23
The following table illustrates some typical format strings for use in printf():
| String | Description |
| %d | Print as a signed decimal integer |
| %u | Print as an unsigned decimal integer |
| %x | Print as an unsigned hexadecimal integer |
| %f | Print as decimal floating point * |
| %2d | Print integer in a width of 2 characters |
| %02d | Print integer in a width of 2 characters left-padded with zeros |
* By default in the DxCore, megaTinyCore, and STM32 Boards cores printf() doesn't include support for printing floating-point values, but a Board menu option allows you to enable this. Note that you will probably need a processor with over 4Kbytes of flash to use this option.
The demo program below gives an example of using some of these format strings.
Display interface
This display interface lets you print to the display using the standard print() or printf() I/O functions to print numbers, hexadecimal digits, and a few additional characters. It has the following features:
- Characters printed to the display go to successive character positions. Characters beyond the end of the display are ignored.
- A decimal point in a string isn't printed as a separate character, but lights the decimal point of the previous character, so the string: "3.1415926" will fit on the eight displays.
- The minus and equals characters are supported, so you can label values; for example "A=2 B=-4".
- A newline character, 10 or \n, resets the cursor to the start of the display.
- You can clear the display by printing a clear character, 12 or \f, or by calling the clear() function.
Defining the segments
The array Segs[] is used to define the segment patterns for the 19 characters: 0 to 9, A to F, space, minus, and equals:
uint8_t Segs[19] = {
0x7e, 0x30, 0x6d, 0x79, 0x33, 0x5b, 0x5f, 0x70, 0x7f, 0x7b, // 0 to 9
0x77, 0x1f, 0x4e, 0x3d, 0x4f, 0x47,                         // A to F
0x00, 0x01, 0x09                                            // space, minus, equals
};
Defining the SerialDisplay class
First we define a class called SerialDisplay based on the Print class. This enables it to inherit the behaviour of the standard I/O functions such as print() to print strings and integers:
class SerialDisplay : public Print {
  public:
    void init();
    size_t write(uint8_t);
    void clear();
    void show(uint8_t, uint8_t);
  private:
    void cmd(uint8_t, uint8_t);
    uint8_t cur = 0;
    uint8_t last = 0;
};
Display-specific routines
The routine cmd() sends a command and data to the display as two bytes:
void SerialDisplay::cmd (uint8_t a, uint8_t d) {
  digitalWrite(cs, LOW);
  SPI.transfer(a);
  SPI.transfer(d);
  digitalWrite(cs, HIGH);
}
The routine show() displays a segment pattern on a specified display, numbered 0 to 7 from left to right:
void SerialDisplay::show (uint8_t d, uint8_t pat) {
 cmd(8-d, pat);
}
The routine init() sends the commands needed to initialise the display, and clear it:
void SerialDisplay::init () {
 cmd(0xF, 0);                                   // Test mode off
 cmd(0xB, 7);                                   // 8 digits
 cmd(0x9, 0x00);                                // Decode segments
 cmd(0xA, Brightness);
 clear();
 cmd(0xC, 1);                                   // Enable display
}
To make the routines work with a different type of 8-digit display you should only have to replace these three routines with whatever is appropriate for the display.
Clearing the display
The routine clear() clears the display:
void SerialDisplay::clear () {
 for (int d=0; d<8; d++) show(d, Space);
 cur = 0;
}
Writing to the display
Finally, the routine write() is called by the Print functions to write a character to the display:
size_t SerialDisplay::write (uint8_t c) {
  if (c == '\n') {
    cur = 0;                                    // Return resets cursor
    return 1;
  } else if (c == ' ') {
    last = Segs[Space];
  } else if (c == '.') {
    last = last | DP;                           // Decimal point on previous display
    if (cur != 0) cur--;
  } else if (c == '-') {
    last = Segs[Minus];
  } else if (c == '=') {
    last = Segs[Equals];
  } else if (c >= '0' && c <= '9') {            // Digit
    last = Segs[c-'0'];
  } else if ((c|0x20)>='a' && (c|0x20)<='f') {  // Hex digit, upper or lower case
    last = Segs[(c|0x20) -'a'+10];
  } else if (c == 12) {                         // Clear display
    clear();
    return 1;
  } else return 1;                              // Other characters don't print
  show(cur, last);
  if (cur < 7) cur++;
  return 1;
}
Stopwatch demo
The following demo program runs a stopwatch on the display, showing minutes, seconds, and hundredths of a second. A split number is also shown but not currently implemented.
First create an instance of the SerialDisplay class, called Display:
SerialDisplay Display;
Then here's the stopwatch demo, which uses printf() to format the data on the display:
void setup() {
 SPI.begin();
 pinMode(cs,OUTPUT);
 Display.init();
}

void loop() {
   int split = 1;
   unsigned long now = (millis() - Start)/10;
   int mins = (now/6000) % 60;
   int secs = (now/100) % 60;
   int centis = now % 100;
   Display.printf("%d %02d.%02d.%02d\n", split, mins, secs, centis);
   while ((millis() - Start)/10 == now);
}
Here's the whole Serial Display library and demo program in a single file: Serial LED Display Program.
Updates
9th April 2022: Added ESP8266 and STM32 to the list of Arduino cores supporting printf().
- ^ MAX7219 8 Digit LED Display on AliExpress.
- ^ MAX7219 Datasheet on MaximIntegrated.
blog comments powered by Disqus