Logic Lab 1G
5th May 2024
This is a new version of my Logic Lab, which provides a selection of 12 logic gates that you can interconnect with patch cables to make a variety of different logic circuits. You can enter inputs using switches, and display the outputs on five coloured LEDs. It's ideal for experimenting with and learning about logic:
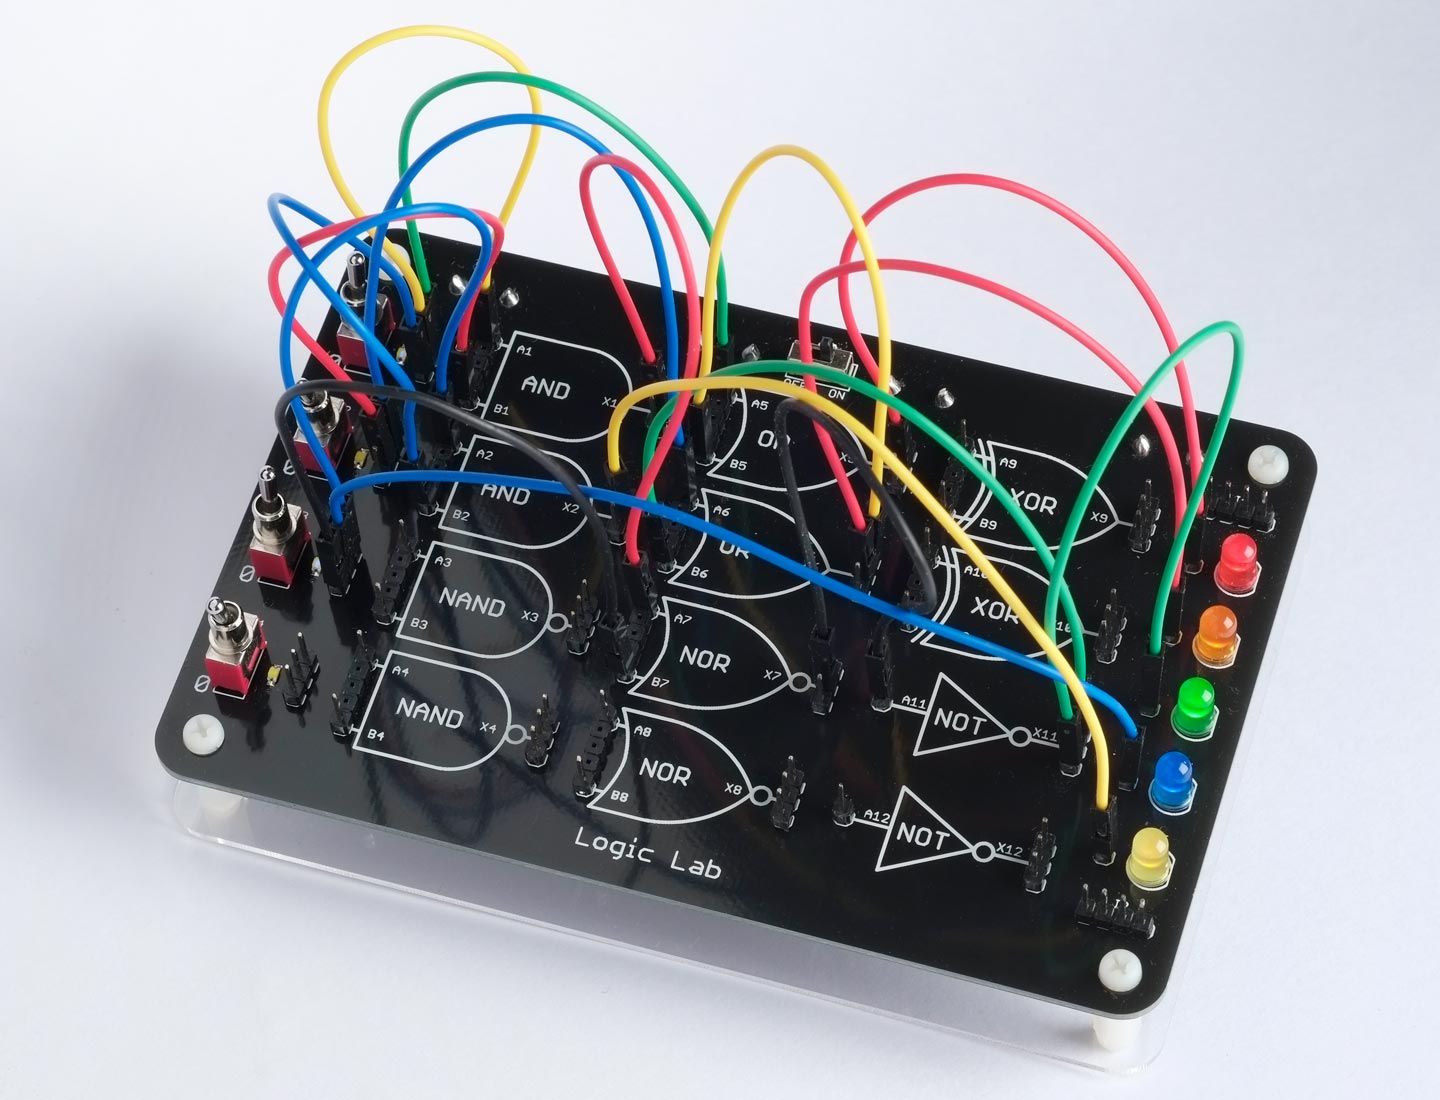
Logic Lab allows you to experiment with logic gates by interconnecting them with patch cables.
This new version of the Logic Lab is identical in operation to the original, but is implemented using discrete "1G" CMOS logic gates; the original implemented the logic using an AVR microprocessor. It is intended for people who were discouraged from building the original circuit because of the need to program an AVR microcontroller, and it also involves easier surface-mount soldering.
The original Logic Lab article included nine logic problems. Since then I've devised five more problems, a logic game, and a logic puzzle; these are all included below. The answers will be given in a later article.
Introduction
When I designed the original Logic Lab I decided it would be more flexible to simulate the logic functions using a microcontroller, because it would give you the option of reconfiguring the selection of gates it provides. I also thought this approach would be cheaper than using 12 discrete gate packages. However, so far I haven't needed to take advantage of the potential configurability.
Also, some reviewers criticised the original design because it isn't using actual logic gates; it is just simulating their behaviour, which is educationally less useful; and to some extent I sympathise with this view.
I therefore decided that it would be interesting to design an alternative version of the Logic Lab based on 1G logic gates, which are individual gates in a small surface-mount 5-pin package, available for a few pence/cents each.
Description
The Logic Lab 1G has the following features, which are identical to the original:
- 12 logic gates: two AND, two NAND, two OR, two NOR, two XOR, and two inverters.
- Four switches, S1 to S4, with LEDs to show the status, that can provide logic inputs to the gates.
- Five coloured LEDs, L1 to L5, that can display the state of the output from a logic circuit. The top three are red, orange, and green, allowing simulation of traffic lights. The other two are blue and yellow.
- Two busses, J1 and J2, that can be used to link patch cables together.
- It is powered by two AAA batteries, with an on/off switch and power indicator LED.
- The inputs and outputs are connected to header pins, so you can interconnect them with a set of patch cables terminated in header sockets.
The Logic Lab 1G has the following improvements over the original:
- I've redesigned it so you can either use slide switches, as on the original, or miniature toggle switches with the same pin spacing.
- In the original Logic Lab, if you connected all five LEDs to a single output the blue LED would be hardly visible, because of its higher forward voltage. I've solved this problem in the current design by buffering each LED.
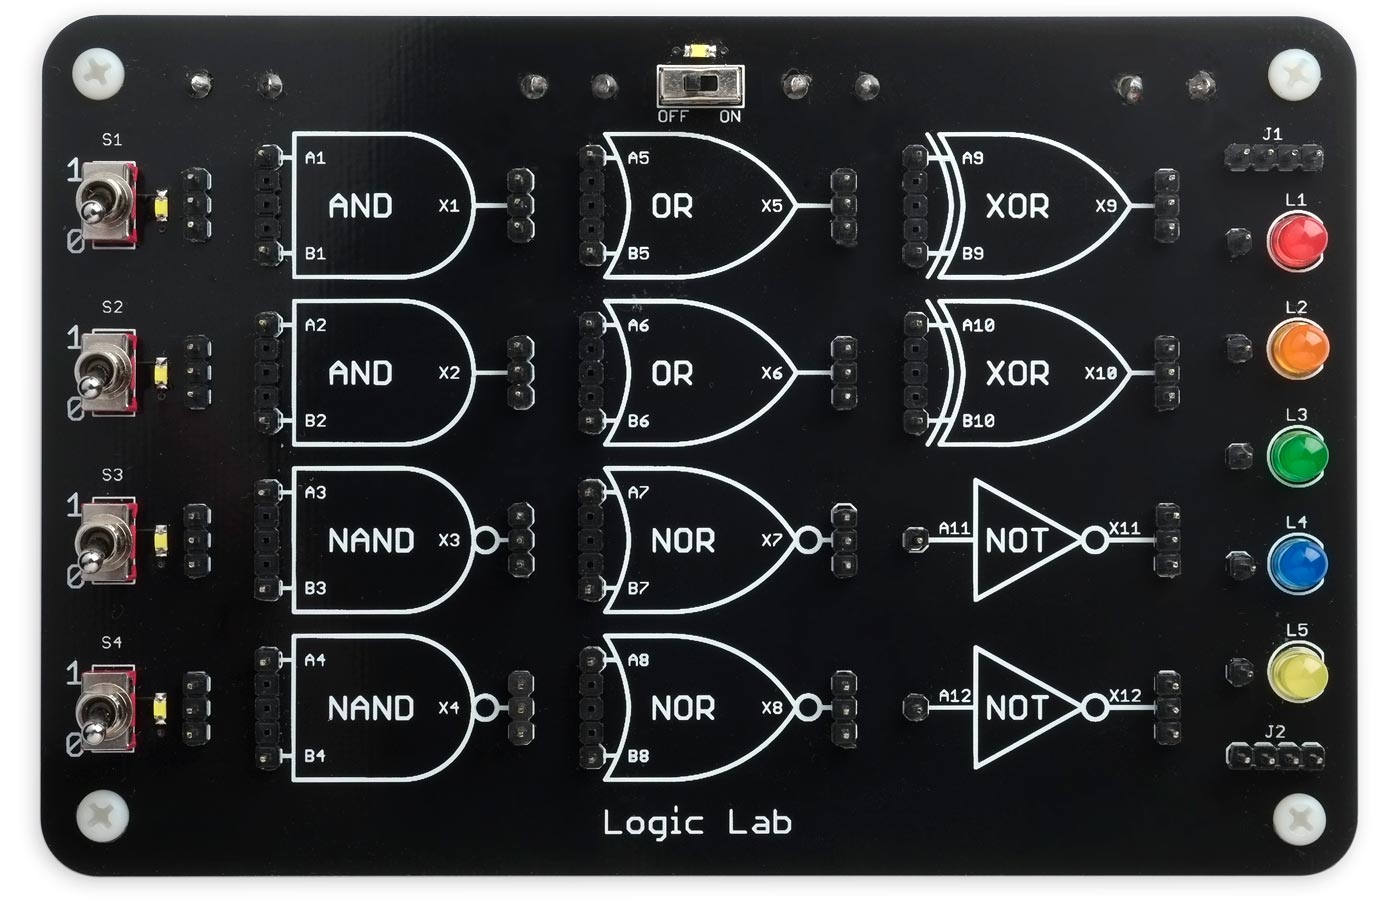
The front panel of the Logic Lab 1G.
The logic gates
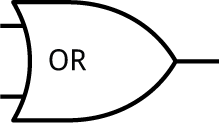
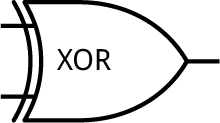
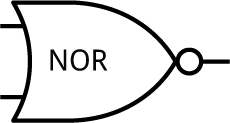
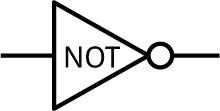
Here's a simple explanation of the six different types of logic gate in the Logic Lab:
|
The output is '1' only if |
The output is '1' if |
The output is '1' if |
|
The output is '0' only if |
The output is '0' if |
The output is the inverse |
Logic problems
Here are 14 sample logic problems to illustrate applications of the Logic Lab. Each problem has an approximate percentage difficulty rating, and they are arranged in increasing order of difficulty. Nine of these problems were given in the original article, and I've added five new problems.
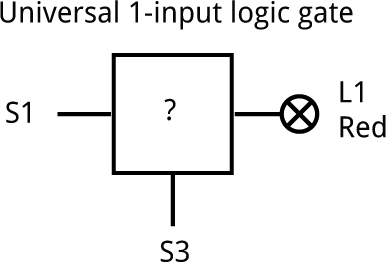
Universal 1-input logic gate (10%)
Design a universal 1-input gate which can act either as a non-inverting buffer, or as a NOT gate (inverter), depending on the input S3:
Traffic lights (15%)
Traffic lights (in the UK) go through the following sequence:
| S1 | S2 | Lights |
| 0 | 0 | Red |
| 0 | 1 | Red and Orange |
| 1 | 0 | Green |
| 1 | 1 | Orange |
Design a logic circuit that lights the red, orange, and green LEDs according to that sequence of switches.
Exclusive-OR (25%)
Two of the gates in the logic lab are exclusive-OR, or XOR, gates; their output is '1' if either of the inputs is '1', but not both.
Design an exclusive-OR gate without using the XOR gates, by using a combination of the other gates in the Logic Lab.
2-bit comparator (25%)
Design a logic circuit that compares two 2-bit binary numbers: A on S1 and S2, and B on S3 and S4. If A and B are equal the green LED L3 should light up.
Safety switch (35%)
A school has a fire warning light that lights up in every classroom. To avoid it being accidentally switched on it has four switches, all of which need to be turned on before the warning will light up.
Design a logic circuit that implements this: the red LED, representing the warning, should only turn on if all switches are set to '1'.
Palindrome checker (35%)
Design a circuit that lights the green LED if the four switches are set to a binary number that's a palindrome, such as '1001', and the red LED if it's not a palindrome, like '1011'.
Hotel light switches (40%)
In a hotel four rooms are on the same corridor, and there's one light in the middle of the corridor. There's a switch outside each room that can be used to control the light.
Design a circuit that allows each of the four switches S1 to S4 to turn the light L5 on or off.
Binary decoder (40%)
Design a circuit that lights up just one of the four LEDs L1 to L4 for each of the different possible settings of switches S1 and S2:
| S1 | S2 | Lights |
| 0 | 0 | Red |
| 0 | 1 | Orange |
| 1 | 0 | Green |
| 1 | 1 | Blue |
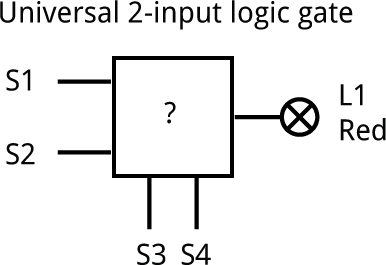
Universal 2-input logic gate (50%)
Design a universal 2-input gate that can be configured to act as one of the four possible gates AND, NAND, NOR, and OR with each of the possible settings of S3 and S4:
Level meter (50%)
A digital level meter works by lighting up a row of LEDs to show the sound level.
Design a logic circuit that lights a row of between 0 and 5 of the LEDs L1 to L5 depending on whether the binary number on the inputs S1 to S3 is from 000 (binary 0) to 101 (binary 5) respectively:
| S1 | S2 | S3 | Lights |
| 0 | 0 | 0 | . . . . . |
| 0 | 0 | 1 | * . . . . |
| 0 | 1 | 0 | * * . . . |
| 0 | 1 | 1 | * * * . . |
| 1 | 0 | 0 | * * * * . |
| 1 | 0 | 1 | * * * * * |
Majority vote (60%)
When the secret spy club needs to vote on an issue, the three members each have a button that they press to register their vote. If there is a majority vote, the issue is passed.
Use three switches to represent the votes, and design a circuit that will light the green LED if the majority vote '1', or the red LED if they don't.
Combination switch (70%)
You have a drawer with an electronic lock, and it can only be opened if you set the correct passcode on four switches. Design a logic circuit that allows you to choose any of the 16 possible passcodes, such as '1011', by changing the position of four patch leads. The circuit should then only light up the green LED if you set the correct passcode on the switches.
Binary adder (75%)
Design a circuit that will add together two 2-digit binary numbers, and put the answer in binary on the three LEDs L3 to L5.
The first number should be on S1 (high bit) and S2 (low bit), and the second number should be on S3 (high bit) and S4 (low bit). The answer should be on L3 (high bit), L4 (middle bit), and L5 (low bit).
2-bit magnitude comparator (90%)
Design a logic circuit that compares two 2-bit binary numbers: A on S1 and S2, and B on S3 and S4. If the number A is greater than B the red LED L1 should light up, if A is equal to B the orange LED L2 should light up, and if A is less than B the green LED L3 should light up.
This is the hardest of the Logic Lab problems, and it's made harder by the constraints of the gates available in Logic Lab, but it is possible!
Logic game
As an example of another application, here’s a logic game you can play on the Logic Lab.
One player wires up four gates of their choice in the following configuration:
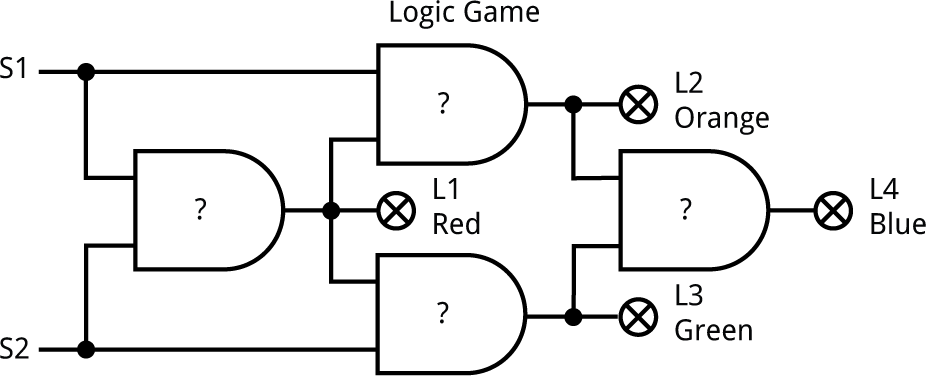
They then cover the wiring with a cloth, and the other player has to work out what the the four gates were, and what the whole function is equivalent to.
To make it harder you can leave out the intermediate lights L1, L2, and L3.
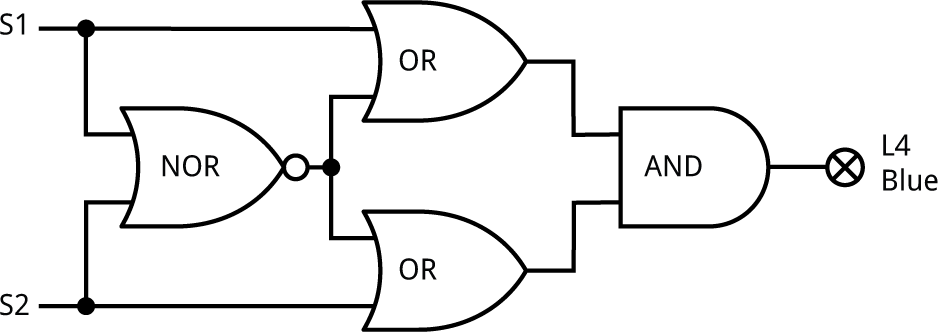
As an example, what is the function of this combination of gates?
A logic puzzle
Finally, here's a logic puzzle based on Logic Lab.
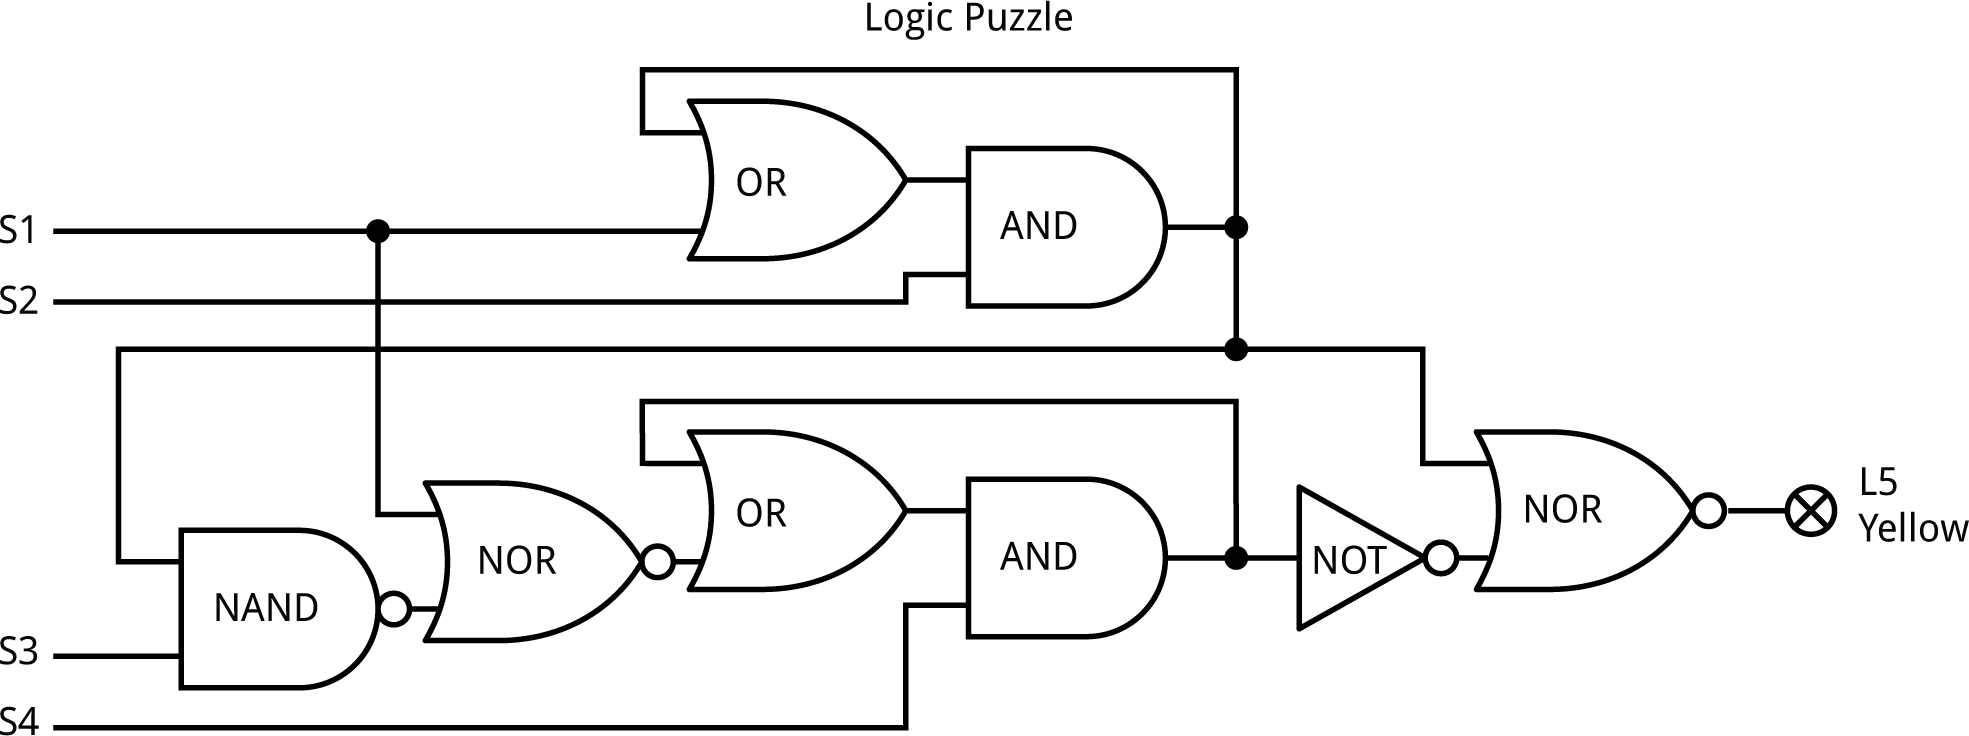
Once you've solved it, can you figure out how the circuit works?
The circuit
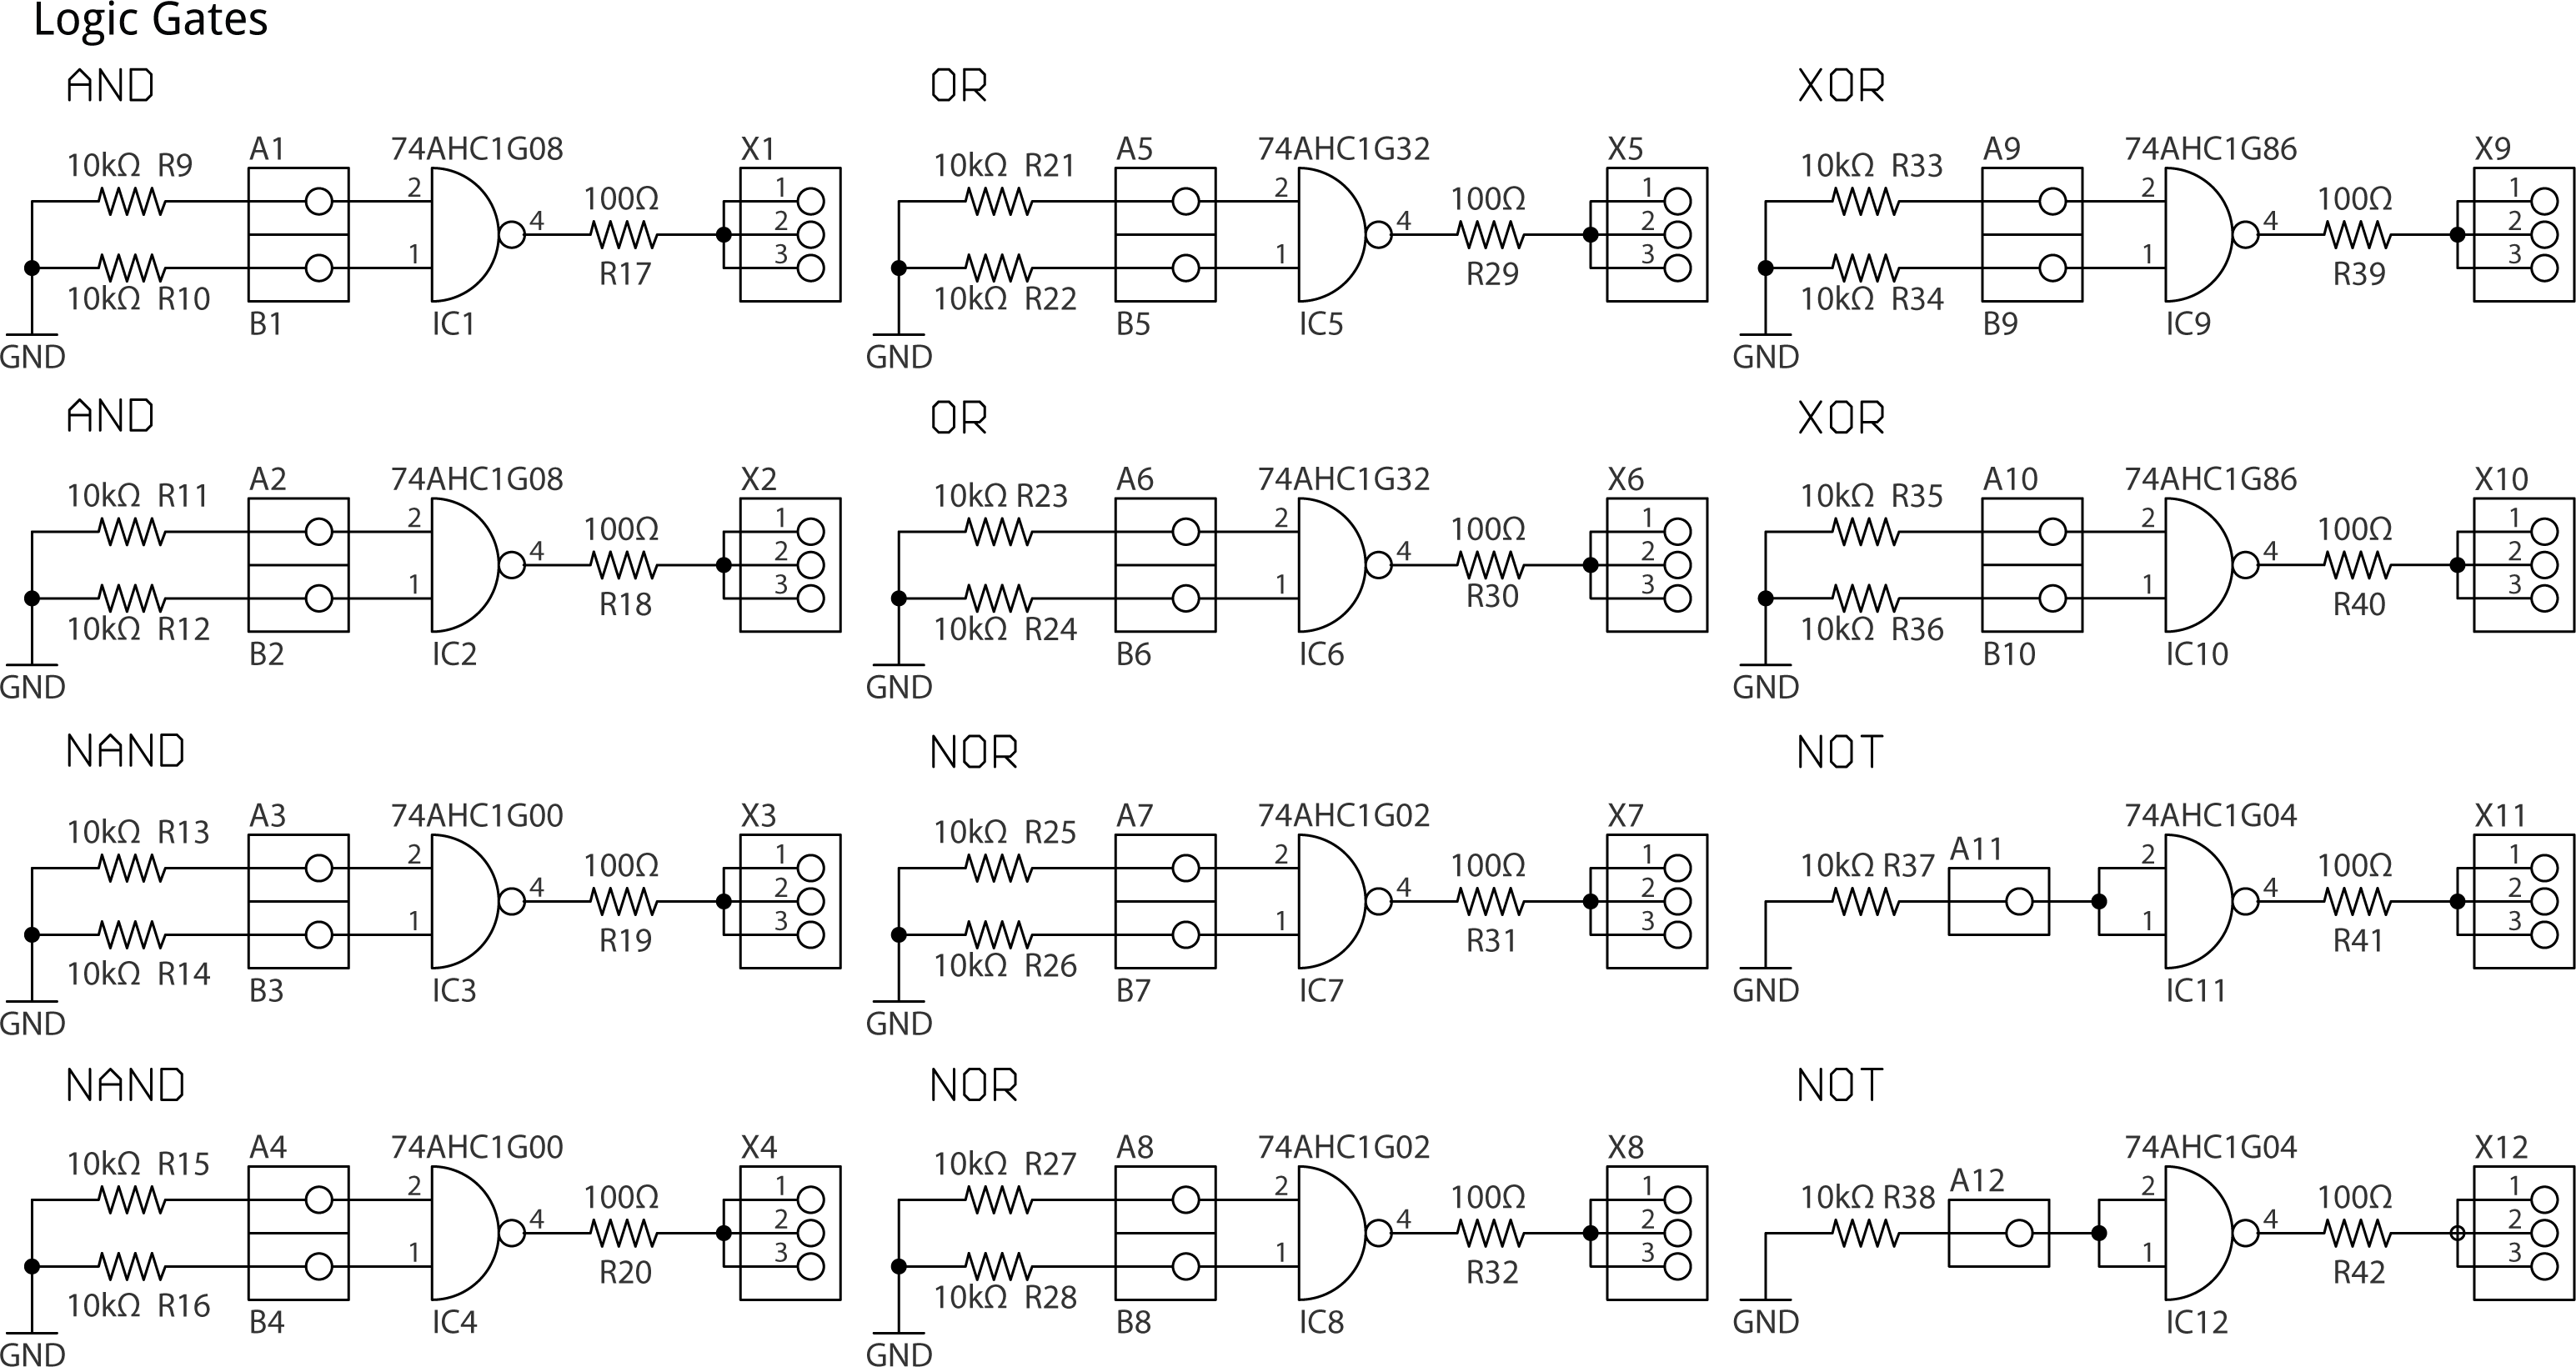
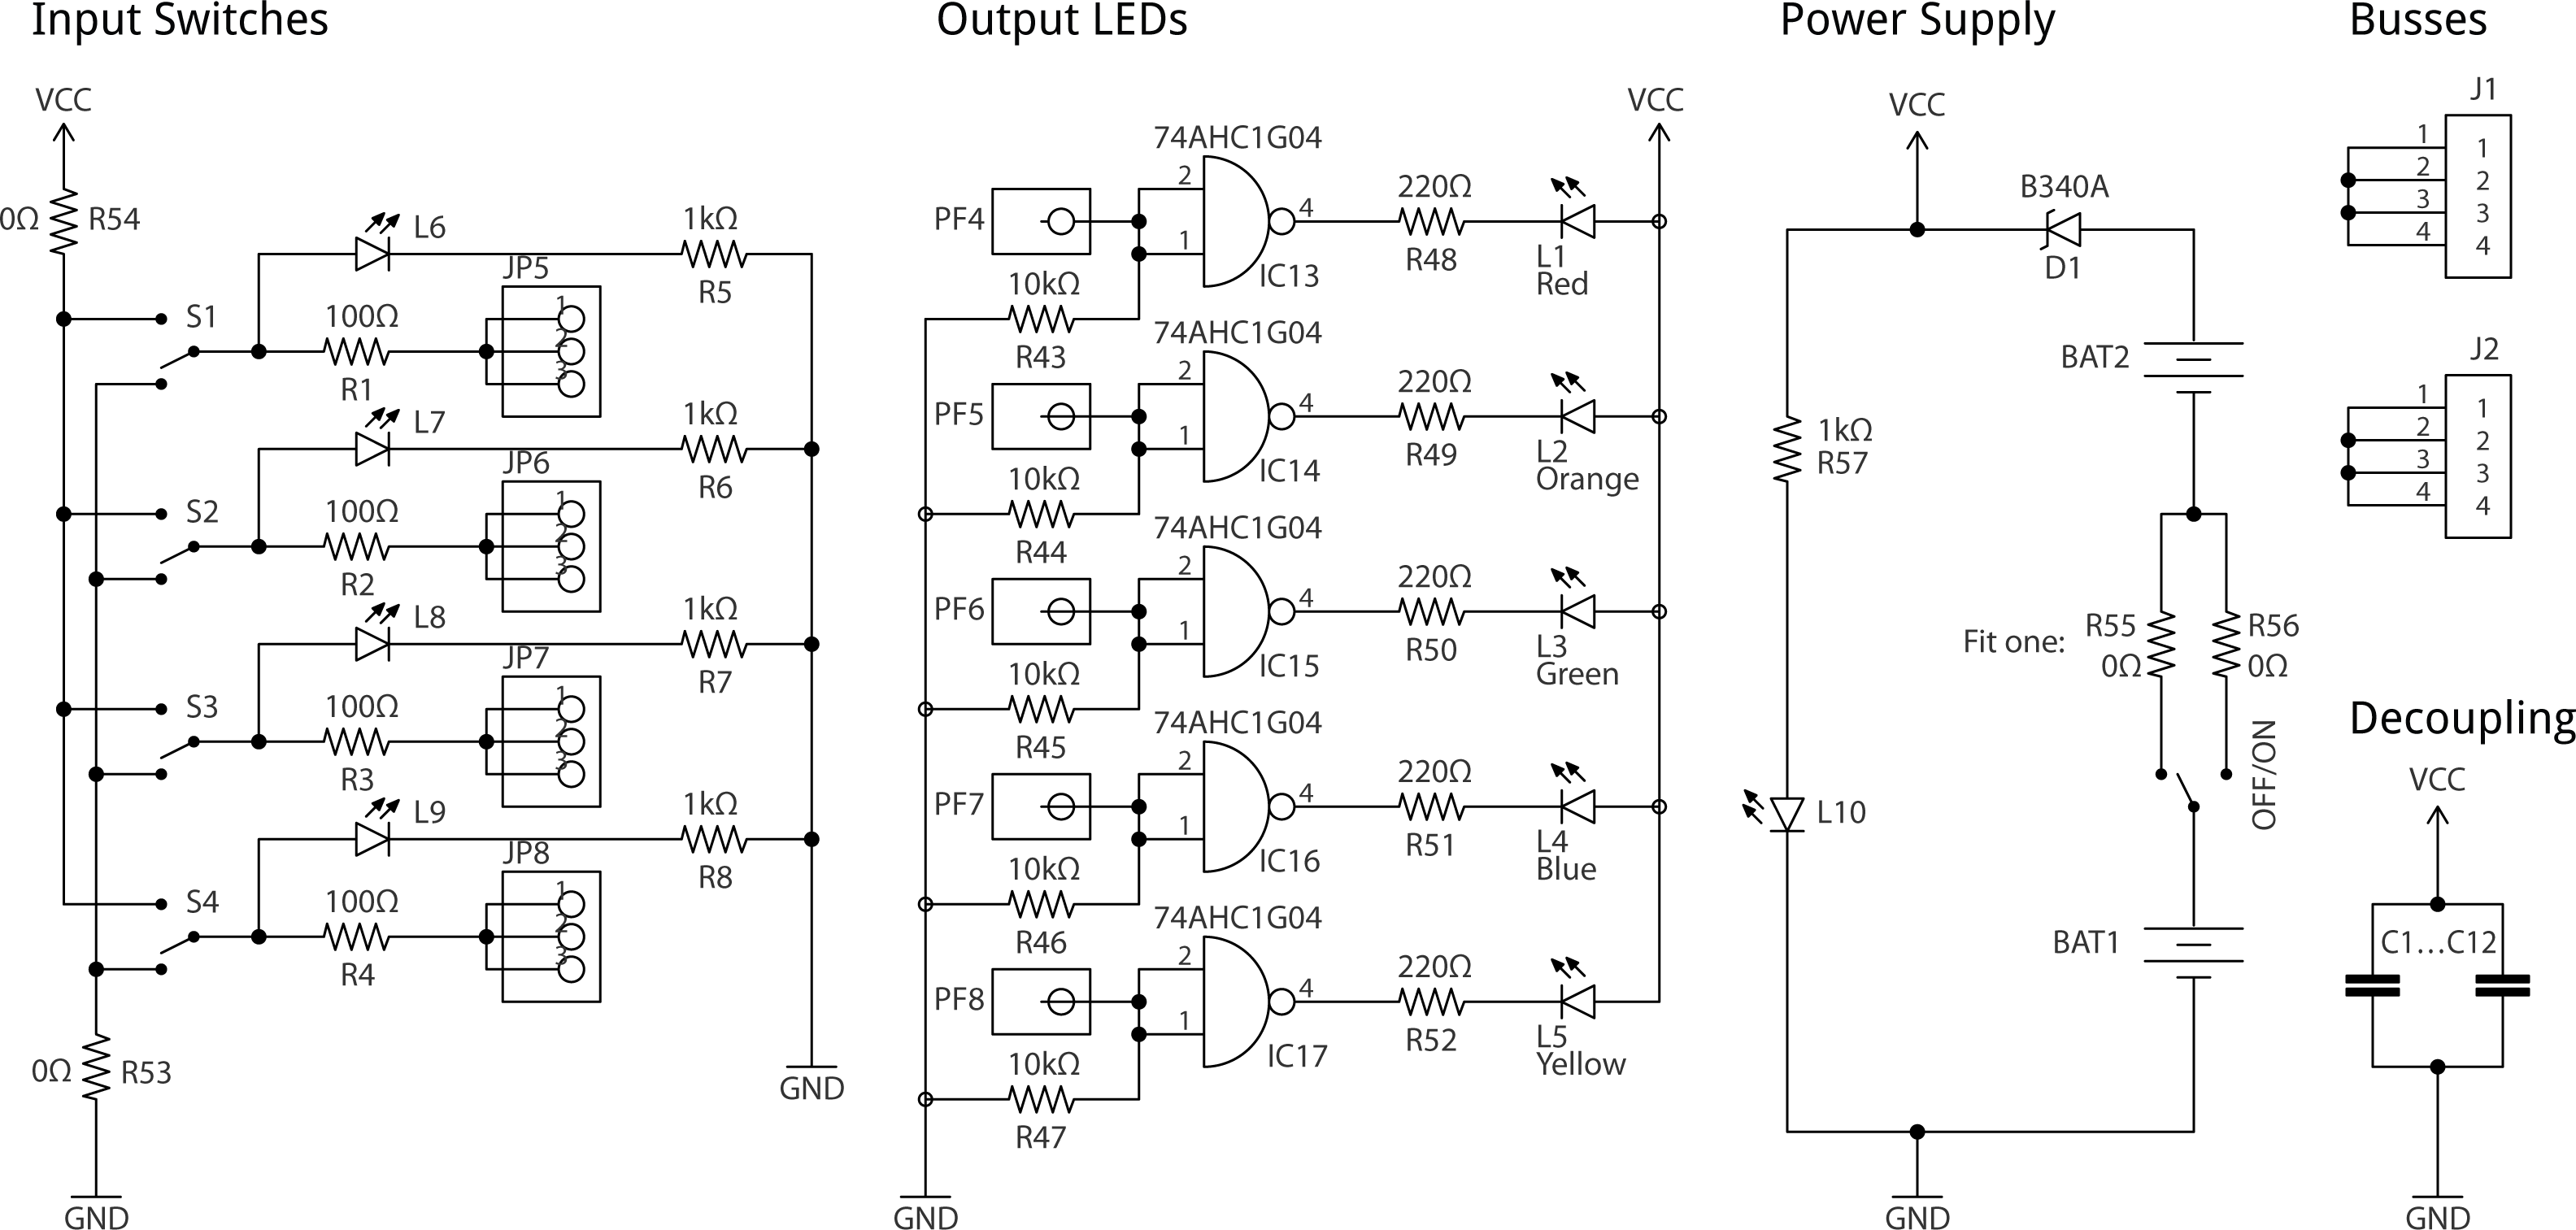
Here's the full circuit of Logic Lab 1G:
The circuit of the Logic Lab 1G logic gates, which use 12 74HC1G-series logic gate packages.
The circuit of the Logic Lab 1G input switches, output LEDs, power supply, busses, and decoupling circuits.
Click to open a larger version of either circuit in a new window.
The circuit uses two of each of the six logic gate types: AND, NAND, OR, NOR, XOR, and inverter. It also uses five inverters to buffer the output LEDs. The PCB is designed so you can use NAND or NOR gates in place of the inverters if this makes ordering the parts easier.
Understanding the logic gate families
The single-gate families from different manufacturers are confusingly named, making it easy to accidentally order the wrong part.
First of all, there are several ranges of logic which differ by voltage range and speed. I recommend the LVC range, which is rated for 1.65 to 5.5V, or the HC range, which is rated for 2.0V to 6.0V.
A second source of confusion is that the single-gate devices are available in several different packages. The Logic Lab PCB is designed for five-pin packages with a 0.95mm pin spacing, and manufacturers have chosen to call this package by different names [1]; they are variously referred to as SOT753, SC-74A, SC59, SOT23, SOT235, SOT25, MO178, and TSOP5, but they are all suitable.
Note that some parts have an extra 'T' in the name; these have TTL voltage levels, and are not suitable. Also, the smaller packages with 0.65mm pin spacing have very similar names, such as TSSOP5, SOT323, SOT353, SC70, SC88A, and SC705, but these will not fit on this board.
Header pins
I used 0.1" pitch header pins for the inputs and outputs, and patch leads terminated in header sockets. The advantage of this is that you can buy the header pins in long strips, and then cut them down to the lengths you need; the header sockets are more difficult to divide up.
LEDs
The five output LEDs are 5mm diffused through-hole LEDs in five different colours, and these can be any colour as they are buffered to avoid problems due to different forward voltages. The other LEDs and resistors are 0805 size SMD types.
Switches
The inputs to the logic circuits are provided by four input switches, S1 to S4. These can either be slide switches as on the original Logic Lab [2], or the new PCB will also support miniature PCB-mounting toggle switches.
Whichever switches you choose, they should have a terminal spacing of 0.1" (2.5mm) to fit the PCB. Note that standard toggle switches with 4.7mm terminal spacing are not suitable.
Here are some suitable alternatives for the toggle switches:
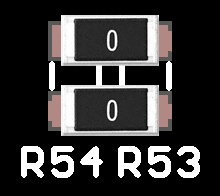
Because toggle switches operate in the opposite direction from slide switches, the PCB provides a way of swapping the configuration to cater for either by fitting two 0Ω resistors in one of two possible configurations:
 |
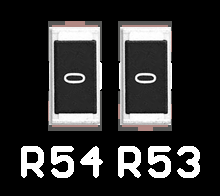 |
| Toggle switches | Slide switches |
Power
The circuit is powered by two 1.5V AAA batteries in series, mounted in through-hole battery clips on the back of the board; see the parts list. Alternatively you could use two PCB-mount AAA battery holders [6] which fit in the same mounting holes.
For the power switch you can again either use a toggle switch or a slide switch; fit a 0Ω resistor in the R55 position for a toggle switch, or in the R56 position for a slide switch.
Short-circuit protection
The board includes 100Ω current limiting resistors on every output, so if the user inadvertently connects together two outputs at different logic levels, the current will be 3/(100 + 100) or 15mA, which is within the 24mA per output drive given on the logic gates data sheet.
Unconnected inputs
Unconnected inputs are treated as being at logic-level '0'. This is implemented by a pull-down resistor on each input. The resistor can be between 10kΩ and 33kΩ.
Patch leads
To use Logic Lab you'll need a set of at least 20 jumper wires terminated in header sockets. I recommend 150mm or 200mm long cables; here are some suggestions:
- The cheapest option is a ribbon cable that you can separate to create a set of jumper wires from Adafruit [7] or The Pi Hut in the UK [8].
- More convenient are separate jumper wires from The Pi Hut [9].
- The nicest but most expensive are silicone jumper wires from Adafruit [10] or The Pi Hut in the UK [11].
Here's the full parts list (click to expand):
► Parts list
Construction
I designed a PCB in Eagle and ordered boards from Elecrow [12]. The board is 100 x 140mm, using a double-sided PCB. There are almost no tracks on the top of the board so you could probably redesign it to use a single-sided PCB. I also created a design for a back panel and ordered this in 2mm thick transparent acrylic [13]. I give links at the end of the article so you can order your own boards.
For the SMD components I used a Youyue 858D+ hot air gun set to 300°C.
When fitting the header pins I did them a column at a time, and found it helpful to push them into something like a 1x36 header socket [14], to keep them correctly aligned and vertical.
For the gate outputs cut the header pins into rows of three pins with a sharp blade. A trick I found for the gate inputs was to cut a row of five pins and pull out the middle three pins with a pair of pliers. This gives a stronger result than using individual pins, and is easier to solder in position.
Battery holders
You can either use individual battery clips, or PCB-mount AAA battery holders [15].
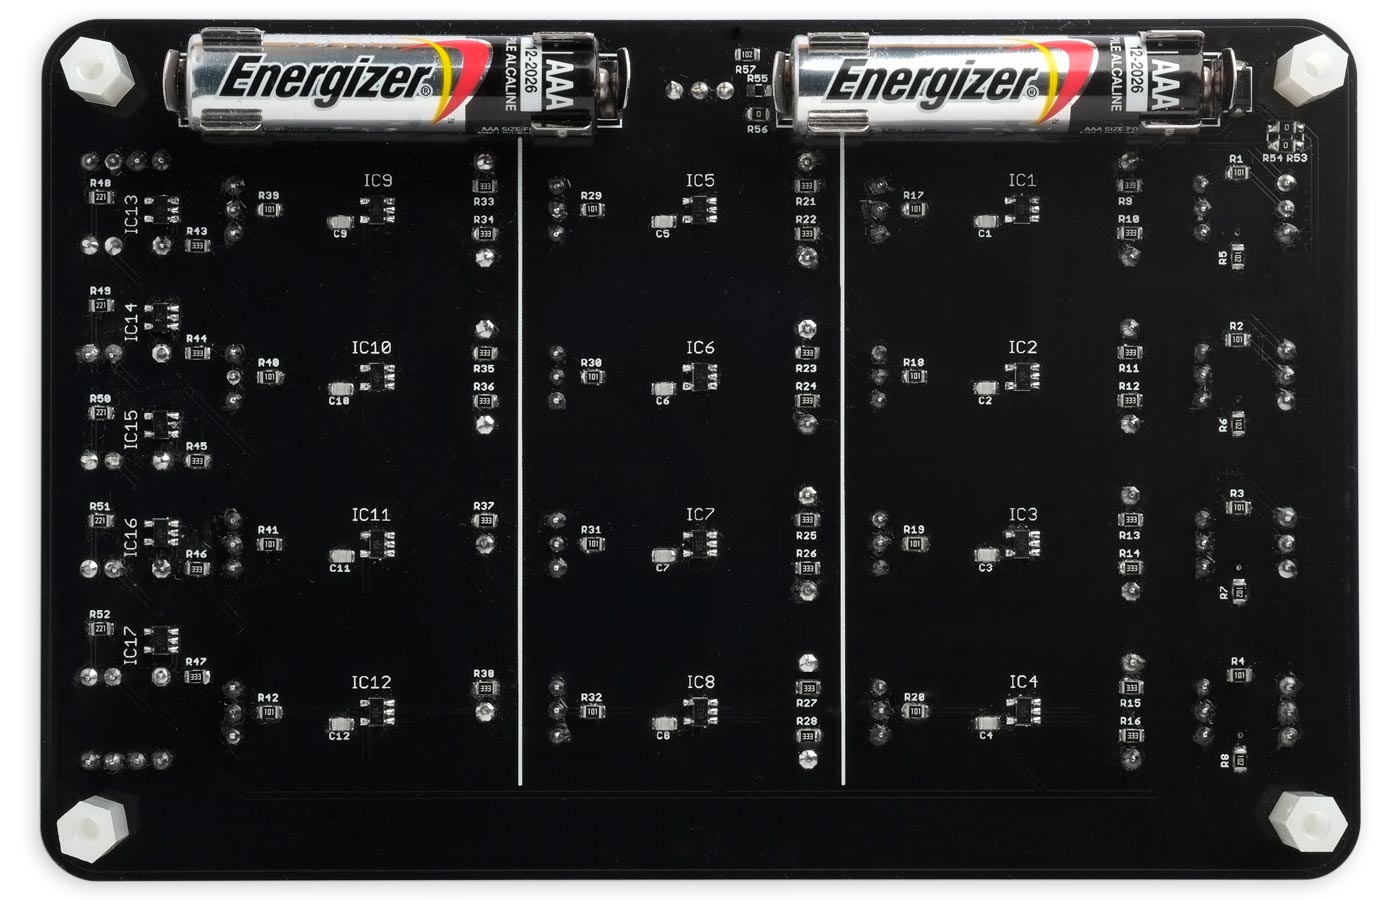
The back of the Logic Lab 1G, showing the components and batteries.
The back is protected by a transparent acrylic back panel, mounted using M3 15mm nylon pillars [16] and M3 6mm nylon screws [17].
Resources
Get the Eagle files or Gerber files for the PCB on GitHub here: https://github.com/technoblogy/logic-lab-1g.
- ^ AN10161 PicoGate Logic footprints on NXP.com.
- ^ SPDT Slide Switch
- ^ Switch, PCB SPDT Vertical - MC2MS1T2B2M2RE on CPC Farnell.
- ^ MULTICOMP PRO 2MS1T2B2M2RE on Farnell.
- ^ Dailywell 2MS1T2B2M2RES on Mouser.
- ^ AAA x 1 Battery Holder PCB Mount on Switch Electronics.
- ^ Premium Female/Female Jumper Wires on Adafruit.
- ^ Premium Female/Female Jumper Wires on The Pi Hut.
- ^ Jumper Wires 10pk (Female/Female) on The Pi Hut.
- ^ Premium Silicone Covered Female-Female Jumper Wires on Adafruit.
- ^ Premium Silicone Covered Female-Female Jumper Wires on The Pi Hut.
- ^ PCB Fab on Elecrow.
- ^ Acrylic Laser Cutting on Elecrow.
- ^ 36-pin 0.1" Female header on The Pi Hut.
- ^ AAA x 1 Battery Holder PCB Mount on Switch Electronics.
- ^ 15mm nylon pillars on Switch Electronics.
- ^ M3 x 6mm nylon screws on Switch Electronics.
blog comments powered by Disqus


