ATtiny85 Weather Station [Updated]
20th December 2018
This is a weather station based on an ATtiny85 and a Bosch BME280 sensor breakout. It displays the atmospheric temperature, pressure, and humidity on a 96x64 SD1331 colour OLED display:
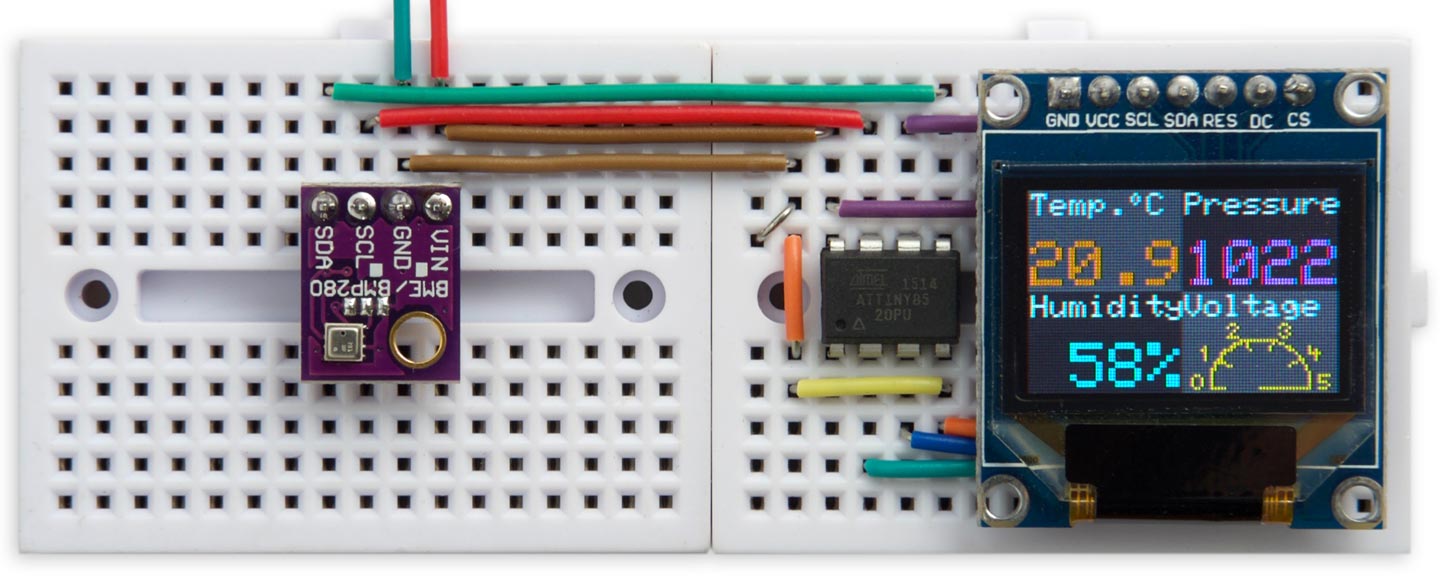
Weather Station running on an ATtiny85 with a 96x64 colour OLED display.
It uses my Widget Dashboard to display the values on the display.
Introduction
To display the readings the Weather Station uses a low-cost 96x64 OLED display with 64K colours, and an SPI interface. It's available from a number of suppliers including Adafruit [1] or Banggood [2].
The Weather Station is based on a Bosch BME280; it's is the perfect sensor for a home weather station as it provides temperature, pressure, and humidity in a single device [3]. It's available on a breakout board from Adafruit [4]:
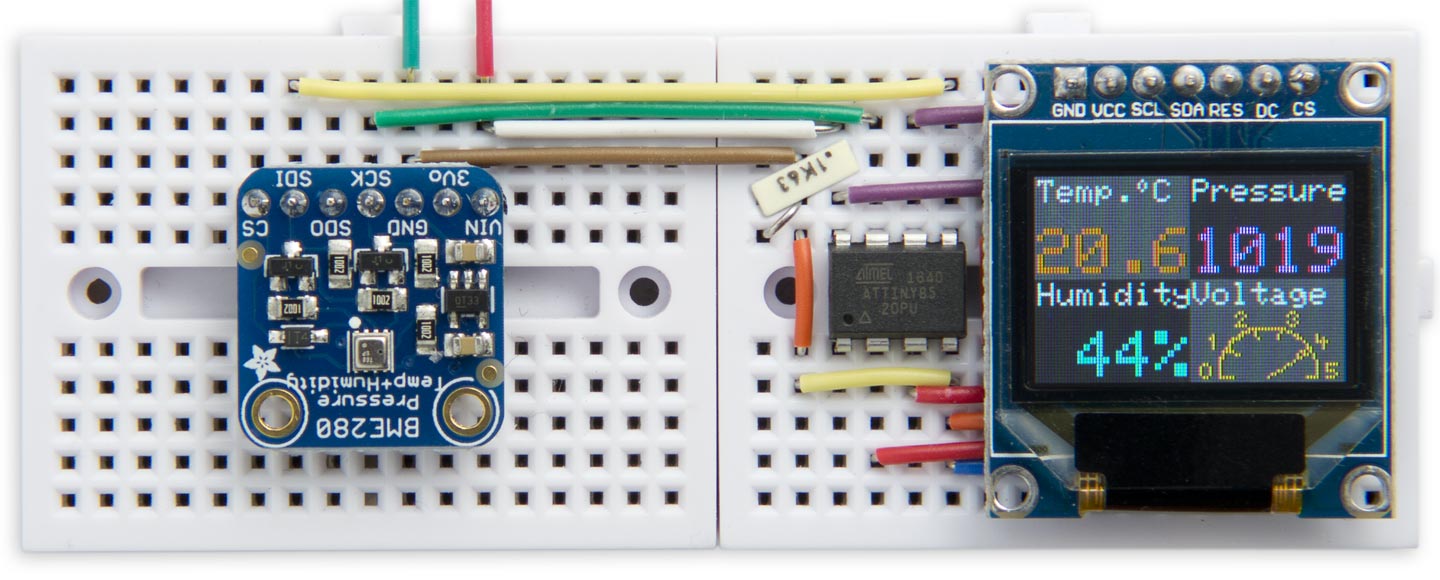
Weather Station running with an Adafruit BME280 breakout board.
Breakout boards are also available from Sparkfun [5], or Chinese suppliers such as AliExpress and Banggood. Some boards, such as Adafruit's, support either 5V or 3.3V operation, so check before buying if this is important to you.
The downside with this sensor is that you have to do quite a bit of calculation to get the final readings; it's not just a case of reading the values from the device via I2C or SPI, as with some other sensors. Both Adafruit and Sparkfun provide a library to interface to the sensor, but unfortunately these don't seem to work on ATtiny processors, such as the ATtiny85, so I set about writing my own Tiny BME280 library.
Tiny BME280
My Tiny BME280 library supports the BME280 sensor on the ATtiny85 and other ATtiny processors. I've only supported the I2C interface as it is the most useful one on ATtiny devices with a limited number of pins.
To use it:
- Download Version 2 of Tiny BME280 from my repository on GitHub: Tiny BME280.
- Put the tiny-bme280-master folder in the library folder in your Arduino folder.
- Add #include <TinyBME280.h> at the top of your program.
As with the other BME280 libraries my library uses the calculations from the BME280 datasheet, and I checked that it gives identical readings to the Sparkfun one. The only difference was with the pressure reading; Bosch gives two versions of the calculation, one using 64-bit integers and one using 32-bit integers. Sparkfun use the 64-bit version and I used the 32-bit version, but this resulted in a difference of under 1 part in 104. I haven't provided altitude or dew point calculations.
This library is also compatible with the Bosch BMP280, a similar sensor that provides just temperature and pressure. If you use this sensor you'll get zero humidity readings.
Routines
The library provides the following routines:
BME280setup() - sets up the BME280 into its normal measurement mode, with no upsampling, and reads the fixed calibrations from the sensor. You should call this once in setup().
BME280temperature() - gives the temperature as a signed 32-bit integer in °C with a resolution of 0.01°C, so an output value of “2134” equals 21.34°C.
BME280pressure() - gives the pressure in Pa as an unsigned 32-bit integer, so an output value of “101325” equals 101325 Pa, or 1013.25 hPa.
BME280humidity() - gives the humidity in %RH with a resolution of 0.01%RH, so an output value of “4653” represents 46.53 %RH.
The BME280 offers a choice of two I2C addresses. Using the Adafruit board the default I2C address is 0x77, or 119, which is what the library uses by default. The other I2C address is 0x76, or 118; to use this address call the following routine before calling BME280setup():
BME280setI2Caddress(0x76) - chooses the alternative I2C address.
If you have the wrong I2C address selected all the readings will be zero.
The circuit
Here's the circuit:
Circuit of the Weather Station based on a BME280 sensor and an ATtiny85.
The following table shows how the pin names on the Geekcreit display shown in the above circuit diagram translate to the alternative Adafruit display [6]:
| Geekcreit display | Adafruit display |
| GND | GND (G) |
| VCC | VCC (+) |
| SCL | SCK (CK) |
| SDA | MOSI (SI) |
| RES | RST (R) |
| DC | D/C (DC) |
| CS | OCS (OC) |
The DC pin is tied low, and doesn't need to be connected to an ATtiny85 pin, because the graphics library is based entirely on commands rather than data. This leaves two I/O pins free on the ATtiny85 for use by the I2C interface to the Bosch BME280 temperature/pressure/humidity sensor.
The resistor from the display's CS pin holds the chip select high to prevent the display from being affected by the ISP signals while programming the ATtiny85. The other 33kΩ resistor and the 0.1µF capacitor ensure that the display is reset cleanly on power-up.
Main loop
The main loop of the weather station reads each of the values from the sensor and displays them using the widgets in the Widget Dashboard:
void loop () {
  int battery = min(22528/analogRead(12),100);
  NumberWidget(PSTR("Temp.\212C"), BME280temperature()/10, ORANGE);
  IntegerWidget(PSTR("Pressure"), BME280pressure()/100, PSTR(""), MAGENTA);
  IntegerWidget(PSTR("Humidity"), BME280humidity()/100, PSTR("%"), CYAN);
  AnalogueWidget(PSTR("Voltage"), battery);
  delay(10000);
}
Temperature
The temperature is displayed in degrees Celsius. For degrees Fahrenheit change the line to:
NumberWidget(PSTR("Temp.\212F"), BME280temperature()*9/50+320, ORANGE);
Pressure
The pressure is displayed in hPa (hectopascals), also called mbar (millibars). The average sea-level pressure is 1013 mbar. Higher pressures generally indicate clear skies, whereas lower pressures indicate rainy weather.
Humidity
The humidity is displayed in percentage relative humidity. Typical relative humidity readings are between 40 and 50% RH; outside this range it will feel uncomfortably dry or humid.
Battery voltage
In addition to the temperature, pressure, and humidity, the fourth widget shows the battery voltage. This is calculated by the following line:
int battery = min(22528/analogRead(12),100);
This works as follows: the call to analogRead(12) reads the voltage of the 1.1V internal bandgap voltage reference relative to the supply voltage. If the supply voltage is V this will return a reading of R, where:
R = 1.1/V x 1024
Working backwards this allows us to get the supply voltage:
V= 1.1/R x 1024
Because the Analogue Widget displays a reading of 5 for an input of 100 we need to multiply this by 20, giving:
20 x 1.1 x 1024/R, or 22528/R.
Compiling the program
I compiled the program using Spence Konde's ATTiny Core [7]. Choose the ATtiny25/45/85 option under the ATtinyCore heading on the Board menu. Then choose Timer 1 Clock: CPU, B.O.D. Disabled, ATtiny85, 8 MHz (internal) from the subsequent menus. Choose Burn Bootloader to set the fuses appropriately. Then upload the program using ISP (in-system programming); I used Sparkfun's Tiny AVR Programmer Board; see ATtiny-Based Beginner's Kit.
Here's the whole Weather Station program with the Widgets Dashboard it uses: Weather Station Program.
Updates
22nd June 2019: Although my prototype appeared to work fine when I built it, it seems that I managed to incorporate three separate bugs that has prevented several users from getting the project to work correctly, including spurious readings, or zero humidity readings. The latest version incorporates corrections to these bugs. Many thanks to users Menno Bakker and SC Kirklan for reporting the problems, and apologies to anyone who wasted time as a result of the errors.
18th November 2019: I've corrected the pin names for the display on the circuit diagram, and added a table to show how these translate to the names used on the Adafruit display.
6th April 2021: Updated the program to show negative temperatures correctly down to -9.9°C.
- ^ OLED Breakout Board 16-bit Color 0.96" on Adafruit
- ^ Geekcreit 0.95 inch 7 pin full colour SSD1331 SPI OLED display on Banggood.
- ^ BME280 Combined Humidity and Pressure Sensor datasheet on Adafruit.
- ^ BME280 I2C or SPI Temperature Humidity Pressure Sensor on Adafruit.
- ^ Atmospheric Sensor Breakout - BME280 on Sparkfun.
- ^ OLED Breakout Board 16-bit Color 0.96" on Adafruit
- ^ ATTinyCore on GitHub.
blog comments powered by Disqus