Setting up the IMST Lite Gateway on TTN
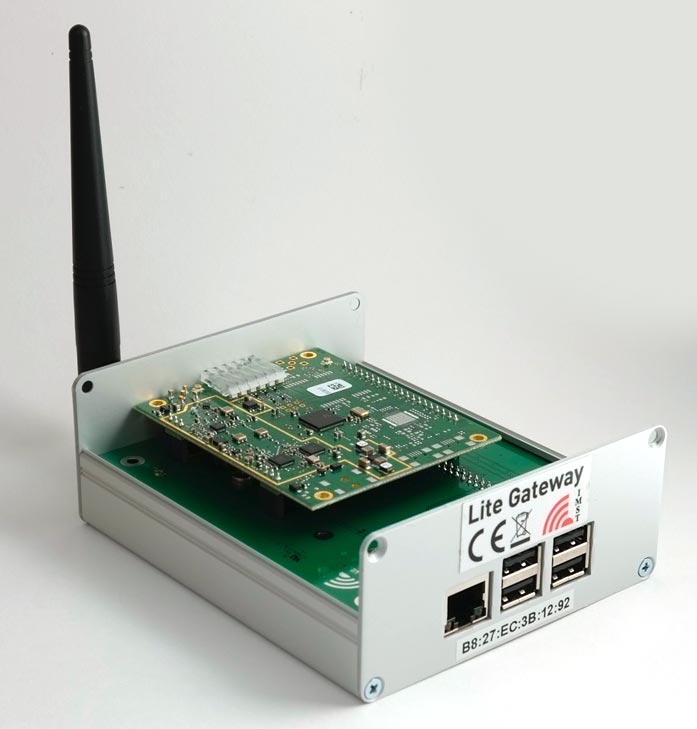
The LoRa Lite Gateway from German company IMST is a reasonably-priced eight-channel gateway based on their iC880A 868 MHz LoRaWAN concentrator and a Raspberry Pi, all fitted on a motherboard in a die-cast box:
It's available from their Web shop:
IMST have made a video explaining how to set up their Lite Gateway on The Things Network:
https://www.youtube.com/watch?v=gYJTDrRstZE
If, like me, you prefer to follow instructions in a web page, or you want to be able to copy and paste commands across to the terminal, here's a transcript of the procedure, using a Mac:
Note that this installation procedure doesn't work with the latest version of Raspbian Lite, Stretch, which is the only one available on the official Raspberry Pi download page.
- Download an image of Raspbian Jessie Lite:
http://downloads.raspberrypi.org/raspbian_lite/images/raspbian_lite-2017-07-05/
- Download the Etcher application to your computer, and use it to copy the image to an 8 GB or larger micro-SD card.
Note that you don't need to format the SD card first, because Etcher does this automatically.
- Add a text file to the SD card with the name ssh and no extension:
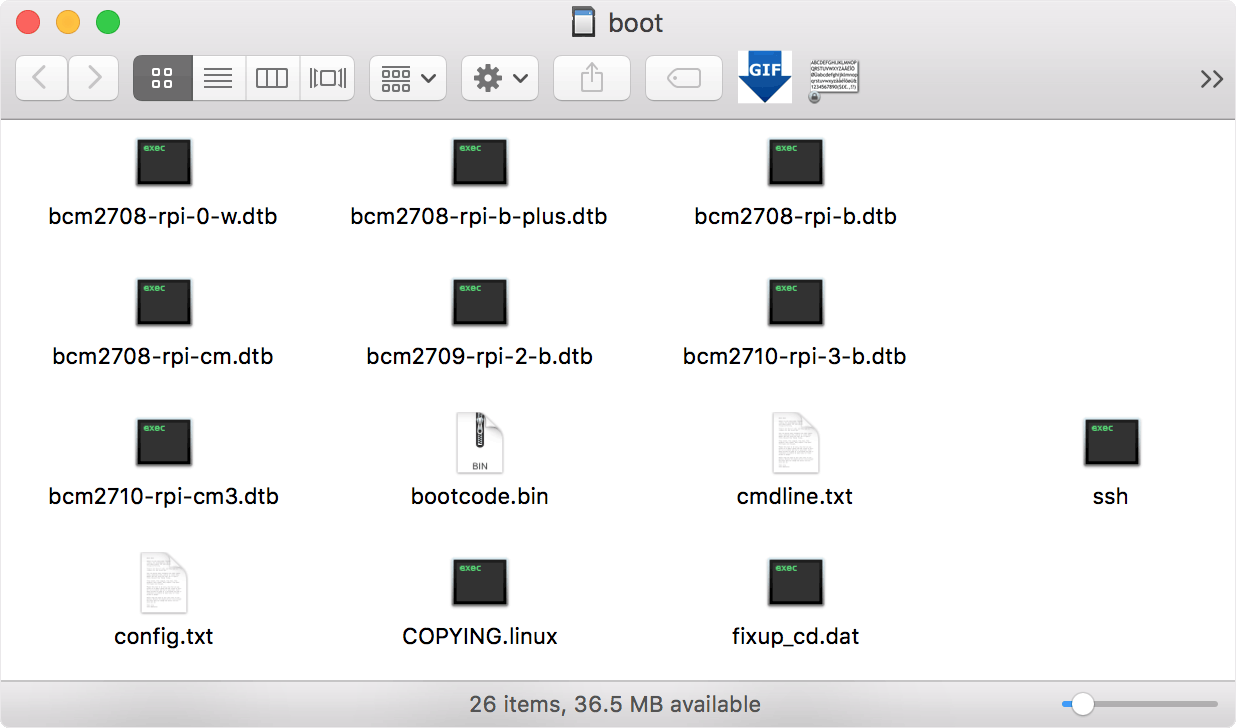
When Raspbian first starts up, the presence of the file named ssh will automatically enable SSH, and the file is then deleted. This will allow you to log in to the Lite Gateway remotely, without needing to connect a keyboard and display to the Raspberry Pi.
- Discover the IP address assigned to the Raspberry Pi by your router.
My router assigns addresses starting with 10.0.1.2, and so this was the correct address. Change the IP address as appropriate for your network.
- Log in to the Raspberry Pi from the terminal, by giving the command:
ssh pi@10.0.1.2
- To the prompt:
pi@10.0.1.2's password:
reply raspberry.
- To the message:
Are you sure you want to continue connecting (yes/no)? yes
reply yes.
- I recommend changing the password to a password of your choice by giving the command:
passwd
- Run raspi-config with the command:
sudo raspi-config
- Select Interfacing Options, SPI, and press Enter to enable SPI.
- Select Advanced Options, Expand Filesystem, and press Enter to confirm.
- Select Finish, and to the prompt Would you like to reboot now? select <Yes>.
- Log in again with the new password you set:
ssh pi@10.0.1.2
- Update Raspbian with the command:
sudo apt-get update
- Upgrade Raspbian with the command:
sudo apt-get upgrade
- To the prompt:
Do you want to continue? [Y/n]
type Y. This takes a bit of time.
- Install GIT with the command:
sudo apt-get install git
To the prompt:
After this operation, 21.3 MB of additional disk space will be used.
Do you want to continue? [Y/n]
type Y.
- Create a user ttn with the command:
sudo adduser ttn
- To the prompts:
Enter new UNIX password:
Retype new UNIX password:
enter a password of your choice.
- Optionally enter the user name and other information, or press Enter to ignore them.
- Let ttn use sudo by entering:
sudo adduser ttn sudo
- Give the command:
sudo visudo
- Add this line to the end of the file:
ttn ALL=(ALL) NOPASSWD: ALL
- Save the changes by typing Ctrl-X and confirming with Y.
- Reboot with the command:
sudo reboot
- Log in as ttn with the password you specified:
ssh ttn@10.0.1.2
- Install the ic880a gateway software with the command:
git clone -b spi https://github.com/ttn-zh/ic880a-gateway.git ~/ic880a-gateway
- Change to the ic880a gateway directory with:
cd ~/ic880a-gateway
- Install the Things Network Gateway with:
sudo ./install.sh spi
- To the prompt:
Do you want to use remote settings file? [y/N]
Reply N.
- Enter this information (using a suitable host name instead of myhost):
Host name [ttn-gateway]: myhost
Descriptive name [ttn-ic880a]:
Contact email:
Latitude [0]:
Longitude [0]:
Altitude [0]:
- If all is well the installation will give the message:
Open TTN console and register your gateway using your EUI:
https://console.thethingsnetwork.org/gateways
Installation completed.
- Log in again
- Navigate to the opt/ttn-gateway/bin directory with the commands:
cd ..
cd ..
cd opt/ttn-gateway/bin
- Give the following command to edit the startup script:
/opt/ttn-gateway/bin $ sudo nano start.sh
Make the following two changes to the file:
- Change the reset pin to 5 by editing the line near the top of the file to:
SX1301_RESET_BCM_PIN=5
- Comment out this line a bit further down by putting a '#' in front of it:
#echo "$SX1301_RESET_BCM_PIN" > /sys/class/gpio/unexport
- Save the changes by typing Ctrl-X followed by Y.
- Run the startup script with the command:
/opt/ttn-gateway/bin $ sudo ./start.sh
- Log in to The Things Network.
- In the Console click register gateway.
- In the Gateway ID field enter the MAC Address of the Lite Gateway, inserting FF FE into the middle of the address:
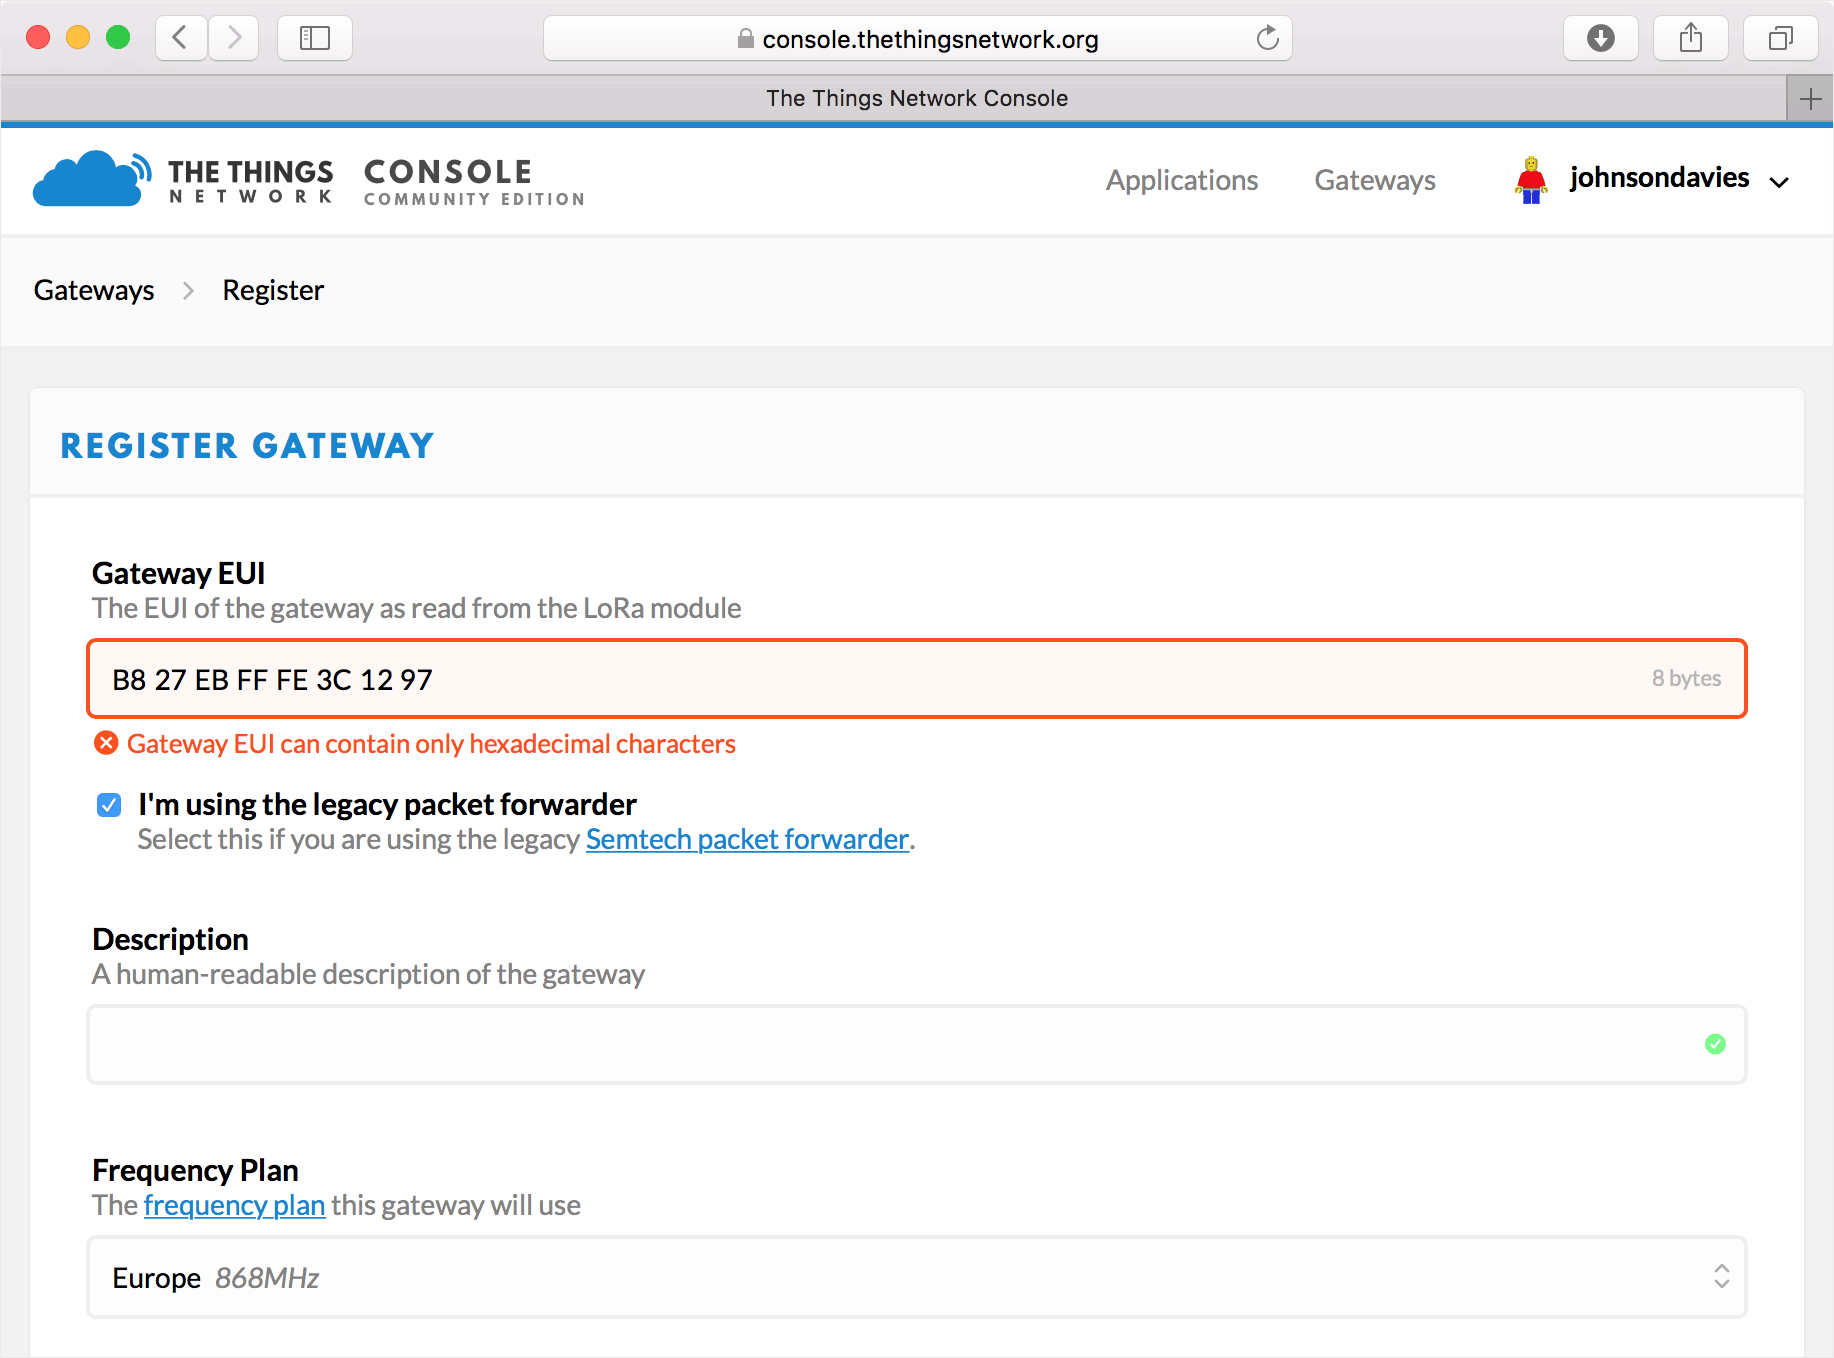
Don't worry about the error message - it will correct itself.
- Select I'm using the legacy packet forwarder.
- Select the appropriate Frequency Plan.
- Scroll down to the bottom of the page and click Register Gateway.
If all is well the Status should change to connected, and you're done.
I'd welcome any suggestions, improvements, or mistakes!
blog comments powered by Disqus